You’ll follow a storyline featuring Eladora, moving from City Chambers through tight old lanes and major viewpoints, including Riddle’s Close, Grassmarket, and the Greyfriars Bobby area. It’s priced at $8.40 per person and doesn’t require attraction entry tickets, which makes it a solid value if you want something more active than a typical sightseeing walk.
Key points to know before you start
- Phone-led clues with story prompts: Your next stop and the next bit of narrative show up on your phone.
- Real Edinburgh stops, not generic photos: You’ll cover landmarks like Greyfriars Bobby and Edinburgh Castle area viewpoints.
- Self-paced breaks built in: At key points (Grassmarket and Greyfriars Bobby), you can slow down and keep exploring.
- No attraction tickets needed: Entry fees aren’t required to finish the game.
- Private activity for your group: Only your group participates, so it feels controlled and low-stress.
- App access matters for multi-phone groups: If one link only loads on one device, use the app’s invite option or contact support.
Why this Edinburgh Harry Potter-style game feels different (and fun)

Edinburgh is already a city where stories stick. This experience leans into that with an outdoor escape-room vibe: you walk, you read, you solve simple prompts, and the game responds by steering you to the next location. It’s not a lecture tour. It’s more like a guided walk you can pause, restart, and control.
The biggest win is the mix of landmarks and side streets. You get mainstream names—Edinburgh Castle and the Greyfriars Bobby Statue area are mentioned for a reason—but you also move through narrower, older-feeling passages like Riddle’s Close. That combination is what makes the whole thing feel like Edinburgh instead of a theme-park walk.
I also like the price-to-time ratio. At about 50 minutes to 1 hour 20 minutes, you get a focused route without committing to a half-day. At $8.40 per person, it’s the kind of activity that can fit between museums, meals, and a proper pub stop.
One more practical plus: you don’t need entry tickets to attractions to complete it. So you can spend your money on food and a few paid highlights you actually choose, rather than being forced into ticketed stops.
Starting at Edinburgh City Chambers: your first clue sets the tone
You begin at Edinburgh City Chambers, 253 High St (EH1 1YJ). The experience starts by handing you your first clue there. From that moment, the game is basically running your walk: you solve, then you get directions and the next story beat.
Here’s why that matters for you. In a self-guided format, the first couple of clues decide whether you’ll feel confident or lost. Starting at a central, obvious meeting point like City Chambers helps you get your bearings fast, so you don’t spend your first 10 minutes troubleshooting.
Also, because it’s mobile ticket based and confirmed at booking time, you should plan to have your confirmation details ready on your phone before you arrive. The experience is designed to run off the device you’re using to play, so treat your phone like the ticket—because it is.
Practical tip: if you’re coming with multiple people, decide early who will be the “main” device versus each person using their own phone. The app can work across devices, but it’s best when everyone’s setup is clear from the start.
Riddle’s Close: when the game guides you off the main drag

One stop in the route is Riddle’s Close. This is the kind of Edinburgh lane that makes the city feel like a character from a book. The game prompts you to study your next clue here, and your solution pushes you onward.
Why I like this section: it breaks up the walk. If you’re sightseeing in Edinburgh, you can end up circling the same views over and over. Riddle’s Close pulls you into a quieter pocket, where the streets feel older and tighter, and where you naturally slow down because you’re in a narrow space.
What to expect: the game isn’t asking you to read historic plaques for long stretches. It’s giving you a clue, then asking you to figure out what comes next. So even if you’re not in a “museum mood,” the pace stays light and moving.
Potential drawback: if your phone loses signal, battery, or loads slowly, this is the part where you’ll feel it. You’re standing in a lane, not a wide public square. Bring common sense backup—charged battery and a way to handle basic app loading issues.
Grassmarket to Greyfriars Bobby: famous Edinburgh sights with built-in momentum
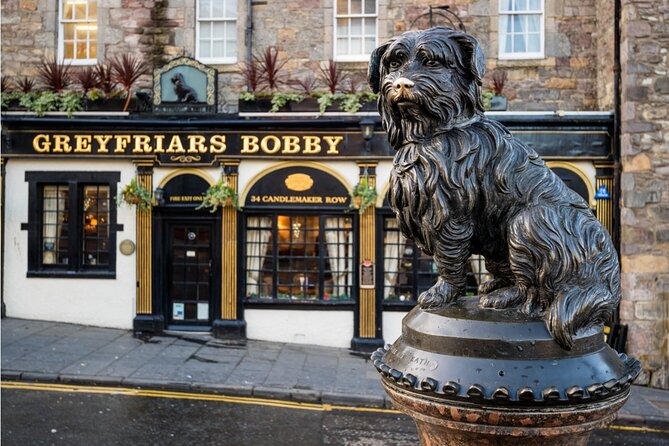
Next you hit Grassmarket, where you’ll receive another clue to solve. After that, the game brings you to the Greyfriars Bobby Statue area, where you’ll get another clue as well.
The important detail here is not just that these are famous names—it’s that the game explicitly gives you time to linger. At Grassmarket and Greyfriars Bobby, you can stop as long as you like and continue at your own pace. That’s a big deal for real-world sightseeing. You don’t have to power-walk through the best views just to keep a group moving.
Here’s how to use that freedom smartly:
- If the weather is good, pause longer around the viewpoints and street corners. This is where Edinburgh’s personality shows up.
- If you’re tired, keep it simple. Solve the clue, stand in the right spot, take a quick look, then move on.
Why this section works well for the “Harry Potter Edinburgh” theme: the city streets and these landmark areas have strong story energy already. The game’s prompts attach that energy to a narrative path, so it feels like you’re discovering connections instead of simply checking boxes.
From the next clue to the final walk: Old Medical School ties it together
Later in the route, you’ll receive your next clue and continue exploring at your own pace. The game then ends at Old Medical School, part of the University of Edinburgh campus (Elsie Inglis Quadrangle, Teviot Pl, EH8 9AG).
At the finish, both the story and the city exploration game end there. That makes planning easy. You’re not wandering with no end point. You can finish, step into a nearby break spot, and decide what to do next based on your energy.
If you like a tour that ends cleanly—with a clear “you’re done” moment—this is a good format. It also helps you feel confident about time, since the full experience runs roughly 50 minutes to 1 hour 20 minutes.
Price and value: $8.40 for a self-guided “outdoor escape room”
Let’s talk value, since the price is unusually low for an experience that covers multiple notable areas.
At $8.40 per person, you’re paying for:
- A guided route between key Edinburgh points
- Phone-based clue prompts and story beats
- A private group setup (only your group participates)
- A format that doesn’t require attraction entry tickets
So your costs are basically: the ticket price plus whatever you choose to spend on food, drinks, or paid stops. Since entry tickets aren’t needed to complete the game, you’re not forced to buy add-ons to “get your money’s worth.”
Who this pricing works best for:
- People who like walking but dislike the pacing of group tours
- Families or friends who want an activity that can keep everyone engaged without needing a guide
- Visitors who want something beyond a standard “see the sights” route
One note on tradeoffs: because there’s no tour guide, you won’t get live explanations or spontaneous questions. If you love a human guide telling you why a street matters, you’ll miss that. If you prefer to learn by noticing and solving, you’ll likely enjoy the format a lot more.
Group size and how to handle multiple phones without stress
This is a private activity, and only your group participates. If your group is larger than 15 people, you’ll need multiple bookings.
For device setup, here’s the practical heads-up I’d follow: if you plan to play on multiple phones under one booking, use the app’s invite option so each participant can use their own email address.
There’s a common mistake people make with mobile games: buying multiple tickets thinking each device will automatically map to a separate phone through the same link. In at least one case, that approach led to the app only working on a single device. The fix was straightforward—invite each friend inside the app using their own email, and if anything still goes wrong, contact the 24/7 customer support team at [email protected] for immediate help. A partial refund may be possible depending on the situation.
So, before you start, do this:
- Confirm everyone has access to the app account they’ll use
- Make sure the invite process is complete
- Have your phone charged and ready
It’s not glamorous, but it makes the experience smoother.
When the route runs best: timing, pace, and what to bring
The experience is listed as playable anytime after booking without rescheduling. That’s excellent if your plans change. You’re not locked into a tight time window.
Total time runs about 50 minutes to 1 hour 20 minutes, but your real pace depends on how long you pause for views and solving. Since the game explicitly allows you to stop longer at Grassmarket and Greyfriars Bobby, plan for at least a little extra time if you want photos and breaks.
What to bring:
- A charged smartphone (the game runs on it)
- Comfortable walking shoes (Edinburgh’s streets add up)
- Water or a snack, especially if you’ll linger at the landmarks
The experience is near public transportation, which helps if you want to start and finish easily without committing to a long walk from a bus or tram stop.
Who should book this Edinburgh City of Wizards game
This is a great match if you want:
- A self-guided walk that still feels structured
- A playful way to see major Edinburgh highlights without a strict tour schedule
- A phone-based activity you can run at your own speed
It also suits groups who want to do something fun together that isn’t just standing in line for tickets.
You might want a more traditional guided tour instead if:
- You want a human guide’s commentary and history explanations
- You dislike technology-dependent experiences
- Your group is likely to struggle with app setup (in that case, choose a time when you can troubleshoot early rather than starting when you’re rushed)
The tone is story-forward, with a Harry Potter-inspired vibe through the narrative about Eladora and the locations tied to JK Rowling’s novels and Hogwarts inspiration. If that’s your kind of travel, you’ll probably have a good time.
Should you book it? My practical verdict
I’d book this if you’re in Edinburgh for a short window and you want an active route that hits multiple memorable areas without extra attraction tickets. The price is low enough that you can treat it as both a game and a sightseeing plan, and the self-paced design means you can slow down when the city gets good.
I would not book it if you’re counting on a live guide, or if your phone access is uncertain. In those cases, the experience can feel frustrating rather than fun. If your group has multiple phones, set up access properly using the invite flow, and don’t wait until the last minute to test the app.
If you want a playful way to walk the city—City Chambers to Riddle’s Close to Grassmarket to Greyfriars Bobby, finishing at Old Medical School—this is a smart, budget-friendly choice.
FAQ
How long is the Edinburgh City of Wizards exploration game?
It takes about 50 minutes to 1 hour 20 minutes, depending on how you pace yourself and how long you pause at the stops.
Where do I start and where does it end?
You start at Edinburgh City Chambers, 253 High St, Edinburgh EH1 1YJ. You finish at Old Medical School, Old Medical School, Elsie Inglis Quadrangle, Teviot Pl, Edinburgh EH8 9AG.
Do I need to buy entry tickets to attractions?
No. Entry tickets to attractions are not included, and you do not need them to complete the tour.
Do I need a live guide with this activity?
No. This experience does not include a tour guide. The story and directions come through the mobile game.
Can I play it at a different time after I book?
Yes. You can play it anytime after booking without rescheduling.
Is there free cancellation?
Yes. You can cancel up to 24 hours in advance for a full refund. If you cancel within 24 hours of the start time, you won’t receive a refund.
]]>What I like most is the guide-led format. You get a private group experience, so the tone can run from mildly spooky to full-on disturbing, depending on what you tell the guide you want. I also really like how the route hits major landmarks without making you sit through lectures; it’s quick, memorable, and there’s a clear payoff at each stop.
One drawback to consider: this tour is explicitly flexible in scare level. If you’re sensitive to dark themes, heavy morbidity, or just don’t want a late-night “creepy” vibe, you’ll want to set expectations up front.
Quick reasons to book this eerie Edinburgh route
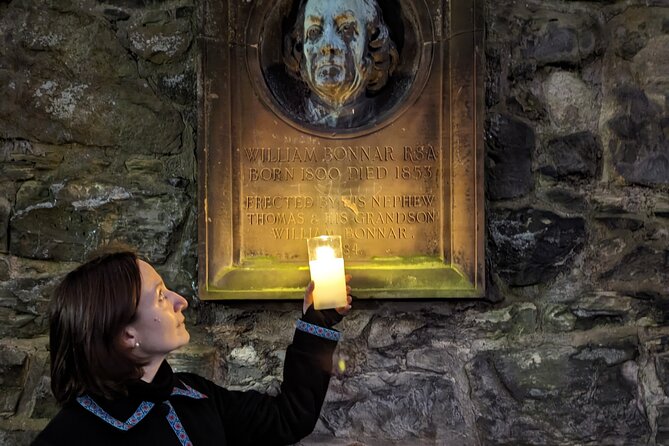
- Private after-dark pacing: only your group, so the guide can adjust the tone.
- Story beats at real locations: you stop at places people actually go by day.
- Multiple “free to view” stops: the sights you visit don’t require you to buy entry tickets.
- German-language option: the provider Edinburgh auf Deutsch has a German version, including guidance from Stephanie.
- A tight 1.5-hour arc: you get a compact route through the Old Town without draining your evening.
Why Edinburgh’s Old Town closes feel scarier at night
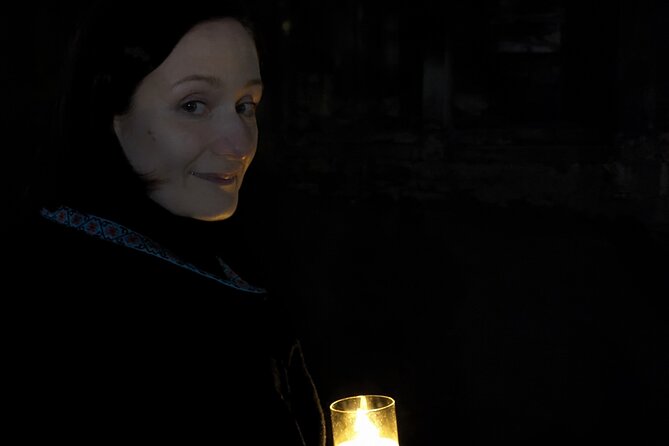
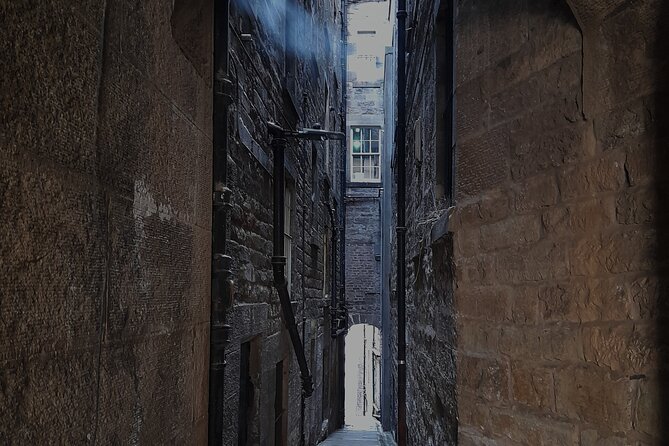
Edinburgh’s Old Town has a special kind of claustrophobia. Those narrow passageways and tucked-in street “cuts” (often called closes) make sound carry and corners appear sharper, even when the streets aren’t busy.
That matters because the tour is built around atmosphere. The story themes you’ll hear—heinous deeds, witches’ brew, and restless spirits—fit the physical setting. In daylight, many of these spots feel like normal architecture. After dark, you’ll feel the design do half the work for the guide.
The route also stays practical. You’re not being asked to go far off the main Old Town corridor, and you’re moving in a logical line from St Giles’ Cathedral area toward Canongate. It’s the kind of walk where you can keep your bearings without needing a map app every five minutes.
The money question: is $68.43 worth 90 minutes?
At $68.43 per person for about 1 hour 30 minutes, this isn’t a “cheap and cheerful” add-on. But it also isn’t priced like a long, multi-hour production. The value comes from what you actually get: a dedicated guide, a private group format, and a string of high-interest stops that are admission ticket free as listed for each point.
You’re also paying for a tight storytelling sequence. The tour hits enough locations to feel like you covered the Old Town’s dark “spine,” instead of just one spooky square. If you’re short on time and want a night activity that feels different from standard sightseeing, this format makes sense.
One more practical detail: the tour is commonly booked about 69 days in advance on average. That’s a sign you should plan ahead rather than assume you can book last minute and still get the exact time you want.
Stop-by-stop: Heart of Midlothian’s football link and Edinburgh’s longest hanging
You start at St Giles’ Cathedral (High St), then the first story beat lands you at Heart of Midlothian. The theme here is the cobblestone heart, and you’ll hear what it has to do with football and Edinburgh’s longest hanging in the city.
Why this stop works: it turns something people casually glance at into a doorway for explanation. Instead of treating the “dark” side as random spooky theater, the guide ties symbols and locations to specific local meanings. You get a sense for how Edinburgh repeats certain themes in public space—monument, memory, and message—sometimes in places you wouldn’t expect.
Timing is also tight—about 10 minutes—so you won’t feel stuck. The trade-off is depth. If you’re the type who wants long, detailed context at one site, this won’t be that tour. It’s built for moving, learning quickly, and letting the overall route make the story land.
St Giles’ Cathedral: what’s hidden behind the concrete

Next comes St Giles’ Cathedral, with a very specific hook: what and who is hidden under the concrete behind the church. The tour keeps that mystery front and center, using the architecture as a clue.
This is a great stop if you like your history explained in plain language. The guide’s style (including humor and confidence, especially in the German version led by Stephanie) is part of why this kind of subject doesn’t feel like a dry lecture. You’ll get the story as a narrative, not a list.
Still, here’s the consideration. Because the tour is adjustable in how disturbing it gets, this cathedral stop may land differently depending on your personal comfort level. If you’re booking for a group, it’s smart to tell the guide what “spooky” means to you so the tone fits everyone.
Mercat Cross and the Royal Mile: medieval public life with a darker edge
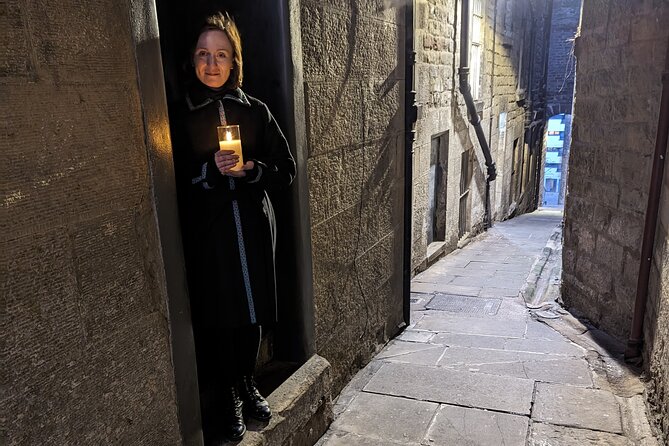
After St Giles, you move to Mercat Cross for about 15 minutes. The guide frames it as a place with a “fun for the whole family” vibe—just with a different meaning in the medieval world.
Then the walk continues to the Royal Mile, where today’s tourist hot spot is described as yesterday’s health hazard. The tour is basically teaching you to read the same streets differently: what you see now wasn’t what people dealt with back then.
This pairing works because it highlights contrasts. Markets, civic centers, and main streets were where public life happened—so they were also where public consequences happened. You’re not learning “random horror.” You’re learning how the city’s everyday functions could be tied to fear, illness, and punishment.
The drawback is the short stop times. Mercat Cross and Royal Mile each get around 10 to 15 minutes, so the guide has to stay focused. That’s good for staying engaged, but it means you’ll want follow-up reading if you want to go deeper afterward.
Tron Kirk and the Netherbow: why some places were meant to be gone
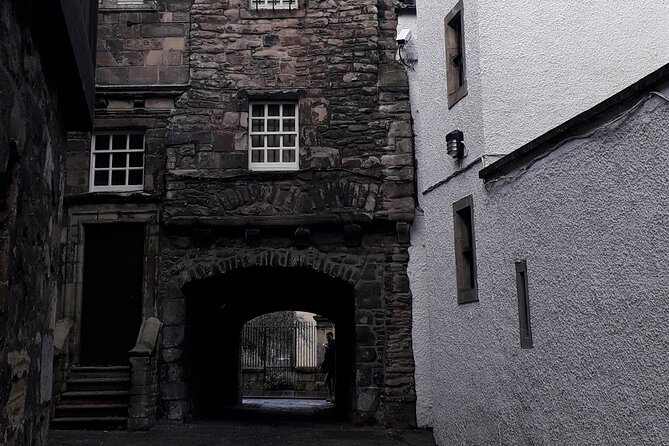
From there you’ll reach Tron Kirk, with the guide asking what a tron is and why you can all be grateful that it’s gone. The topic sounds playful at first, but the tour keeps pulling you back toward darker themes—how civic systems and places shaped people’s lives.
You then continue to the Netherbow, with the stop framed around going beyond the world’s end. Even without turning into a ghost-hunting expedition, it’s clear the tour uses wording that leans into unease. It’s the kind of storytelling that makes you look at a doorway, a corner, or a gate and wonder what happened there.
These stops are about transformation. Tron Kirk is a good example of how the guide turns an odd word into context, then into a reason to care. And the Netherbow ties the Old Town’s physical boundaries to a feeling of crossing a line.
One thing to note: because these are quick stops (around 10 minutes each), you’ll get the meaning fast, but you won’t have time to linger for photos. If you want more “stand and stare” time, you may find the pace a bit brisk.
Canongate and Canongate Kirk: neighboring town bloodshed and a special Resurrection
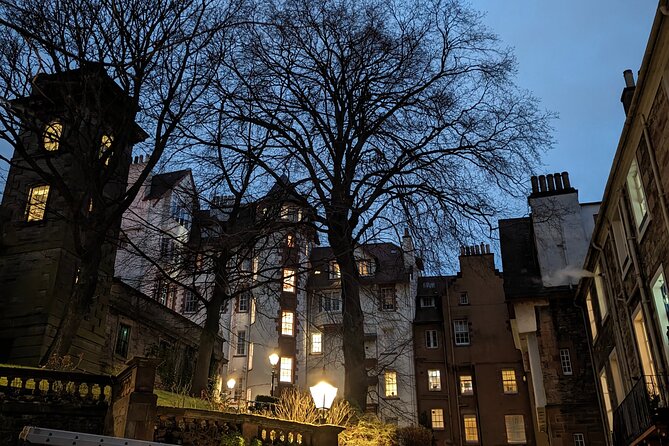
The route shifts into Canongate, Edinburgh’s former neighboring town, where the tour promises its own bloody history. This is your next step after the Netherbow, with about 10 minutes allocated here so you can absorb the story thread before moving on.
Then you end with Canongate Kirk for about 15 minutes. The guide’s hook here is a special definition of the Resurrection—exactly the kind of detail that keeps the tour from staying vague. It’s not just “spooky church.” It’s a specific idea tied to a specific location.
These final stops are where the tour often feels most complete. Early on, you’re learning the city’s symbols and public consequences. Later, you’re seeing how communities and religious framing influenced what people believed about death and what came after.
The other practical upside: the walk ends at Canongate Kirk (153 Canongate). So once the stories finish, you’re already in a logical place to continue your evening nearby.
How the guide’s tone changes the experience (and how to control it)
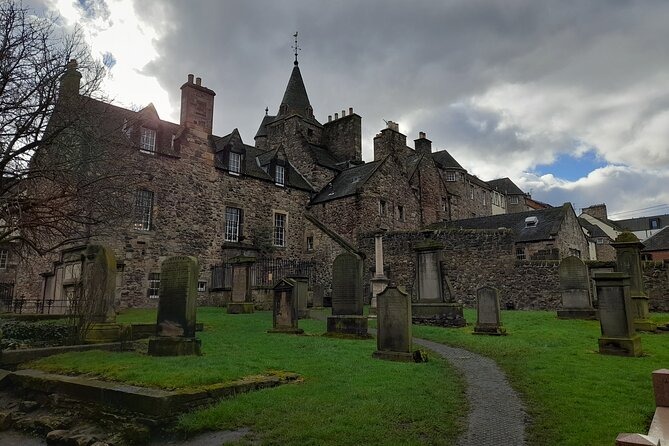
This is one of those tours where you can affect the outcome. The tour description says the experience can be mildly spooky or full-on disturbing, and you’re asked to let the guide know what you want.
That’s hugely important for group planning. If you’re booking with friends, teens, or anyone who hates the “too much” factor, speak up when you meet or before you start. You can keep it fun and spooky. Or you can lean into the darker side.
It also helps that the storytelling style is described as interesting, funny, and confident, with lots of laughter. In the German version, Stephanie has a way of delivering the material that fits the mood without turning it into a lecture. You’ll feel like you’re getting a story told to you, not a script read at you.
Who should book this private eerie Edinburgh walk?
I think this tour is a strong fit if you want an evening activity that feels local and specific. If you like walking tours but you’re bored by generic history plaques, the dark-theme approach gives you a reason to pay close attention at every stop.
It’s also a good match if you enjoy humor in historical storytelling. The idea is to make the material memorable and to keep the route from becoming heavy all the way through.
You might skip it if you want a light, casual evening stroll only. The themes include hangings and other grim subjects, and the tour can be disturbing depending on the tone you choose.
Should you book Eerie Edinburgh?
If your goal is a short, private, after-dark route that teaches you how Edinburgh’s landmarks carried fear, punishment, and belief, this is a smart pick. The price of $68.43 per person makes sense for a 1.5-hour guided storytelling walk that focuses on multiple stops without you needing paid entry tickets.
I’d book it if you’re comfortable with dark history and you like guided storytelling that has humor. I’d hesitate if your group wants a gentle, low-intensity experience, or if anyone is sensitive to disturbing content.
FAQ
FAQ
How long is the Private Dark History Tour: Eerie Edinburgh?
It lasts about 1 hour 30 minutes.
What is the meeting point for the tour?
The tour starts at St Giles’ Cathedral, High St, Edinburgh EH1 1RE, UK.
Where does the tour end?
The tour ends at Canongate Kirk, 153 Canongate, Edinburgh EH8 8BN, UK.
Is this tour private?
Yes. It’s a private tour/activity, and only your group participates.
Do I need to buy admission tickets for the stops?
Admission tickets are listed as free for the stops included in the itinerary.
What does the tour cost?
The price is $68.43 per person.
How soon will I get confirmation after booking?
Confirmation is received within 48 hours of booking, subject to availability.
What is the cancellation policy?
You can cancel for a full refund up to 24 hours in advance of the experience start time.
Are service animals allowed and is the tour near public transportation?
Service animals are allowed, and the meeting point is near public transportation.
Can I book a German-language version?
The experience provider is Edinburgh auf Deutsch, and a German-language tour is referenced in the available feedback.
]]>I also love how the guide handles the heavy lifting. Instead of you googling pubs, routes, and “best views,” you get a local host who matches the mood to what you want—history, a proper pub crawl, live music, or something a bit classier. When you end with a stack of nightlife recommendations, it genuinely helps you plan the rest of your trip without guessing.
One possible drawback: it’s still a night walking experience. You’ll want comfortable shoes and warm layers, because Edinburgh evenings can feel sharp, and you may spend time moving between spots rather than settling in one location.
Key things to know before you go

- Private and personalized route built around your interests, not a fixed schedule
- Two included drinks (beer or Scotch whiskey is part of the vibe, and your choices matter)
- Old Town focus at night, with nightlife neighborhoods and classic pub options
- Flexible stops, from Cowgate pubs or live music to wine or cocktails on George Street
- Royal Observatory stargazing for a different kind of Edinburgh finale
- Start and end at the same meeting point, so you’re not left figuring out the last stretch
Why this private Edinburgh night tour is more useful than it sounds
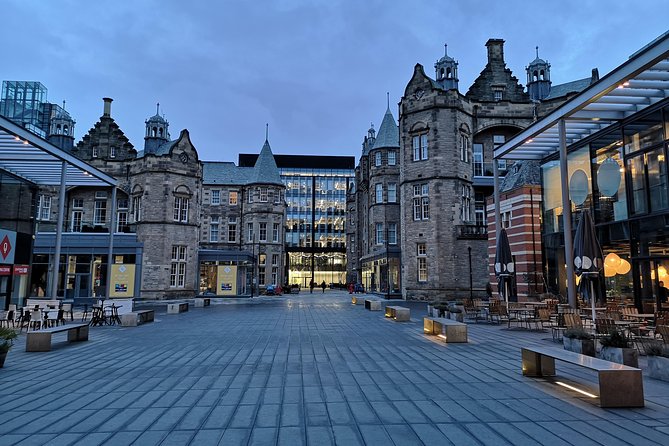
Edinburgh at night can be fun and confusing. Streets glow, pubs pull you in, and suddenly you’ve walked three miles without a clue what you should do next. This tour cuts through that with a guide who’s focused on your pace and preferences.
The biggest win is attention. On a private tour, you’re not squeezing your questions into a group shuffle. If you want context on Scottish history, local culture, or why the city looks the way it does, you’ll get real answers—like the guides named Thomas and Tom, who impressed people by answering a steady stream of questions and adding extra context that wasn’t obvious before the tour.
The second win is decision-making. Instead of “Let’s try this place and see,” your host picks bars and neighborhoods based on what you like. That means you’re more likely to land in the right kind of atmosphere: classic and cozy, lively pub crawl energy, or a calmer night with wine and cocktails.
Meeting point at Harvey Nichols: easy start, clear plan
You begin at Harvey Nichols Edinburgh, 30–34 St Andrew Sq (EH2 2LL). It’s a central, recognizable spot, which matters on a night tour when you don’t want to waste time hunting for your group.
The good part: the tour ends back at the meeting point. That keeps the logistics simple. You’re not dealing with transit timing or trying to map your way home while you’re a little more relaxed than when you started.
If you’re staying close enough to make it practical, a hotel meet-up is available on request for a central location. You’ll still have the same overall rhythm—just with a smoother start if your hotel is convenient.
Stop 1: Sheep Heid Inn or a similar classic pour
Your first stop is set up as a proper kickoff: a local pub or hip bar where you can have a beer or Scotch whiskey. One of the specific options mentioned is the Sheep Heid Inn, a long-running institution known for serving drinks since the 14th century.
This is more than a drink stop. Your first pub is where your guide can read your vibe quickly—are you here for history, do you want a lively atmosphere, or are you more interested in the stories behind the streets? It’s a smart move for a private tour because it shapes the rest of the night.
Practical tip: this is where you can use the included drinks wisely. Since the tour includes two drinks of your choice, decide early if you want to lean into Scotch, mix it up, or keep it straightforward with beer. You’ll feel less rushed later, because you’ve already claimed your main included value.
Old Town at night: your guide chooses the nightlife neighborhood

Next, you head into a nightlife-heavy area in Edinburgh’s Old Town. The streets here are lined with pubs and bars, and the host will pick specific spots based on your tastes.
This is where the tour earns its “personalized” label. Edinburgh has lots of similar-looking evenings from a distance—steep streets, stone buildings, and a line of doors promising good drinks. A guide prevents you from ending up in the wrong kind of place for your mood.
What you can expect: a walking route through parts of the Old Town where your guide can explain what you’re seeing and steer you toward the right atmosphere. If you prefer something more relaxed, the host can steer away from pure crawl energy. If you want classic pub culture, you’ll get that too.
Possible drawback to keep in mind: if you’re the type who gets tired quickly on foot, night walking in Old Town can add up. You’ll be moving between venues, so it helps to wear comfortable shoes and plan for short stops rather than long sits.
Cowgate pub crawl energy, or live music instead

One option on the route is Cowgate, a classic Edinburgh nightlife lane. Depending on your interests, your host may lean into the classic pub crawl style or pivot you toward a cozy live music venue instead.
This choice is exactly why private works better than a generic checklist. If you love the idea of a crawl, Cowgate scratches that itch. If you’d rather hear something fun and stick around longer, live music can make the night feel more like an evening out than a series of quick stops.
I like the way this part of the tour keeps your evening from going stale. After the first couple of drinks and street stories, a change in energy—music, a different bar style, a new vibe—keeps momentum going. It also helps you get a better read on what Edinburgh nightlife feels like beyond one street.
The Dome on George Street: wine and cocktails when you want polish

If you’re in the mood for something swankier—cocktails, wine, an elegant bar—your host may suggest The Dome on George Street. The idea is simple: give you a more polished pause before the night’s final act.
This kind of stop matters because it changes your “data set” of Edinburgh nightlife. Not every bar scene here is the same, and a wine bar-style ending can feel like a reset. It’s also a nice moment to ask the guide for recommendations for the rest of your trip—what to do tomorrow, where to go for a slower meal, or what sights are worth revisiting in daylight.
Practical tip: since only two drinks are included, decide whether you want your included drinks to be the fancy ones here or earlier. If you care about trying Scotch, use one included drink for that early. If you’d rather sample a wine or cocktail experience, save the included drinks for this stop.
Royal Observatory stargazing: the best kind of Edinburgh finale
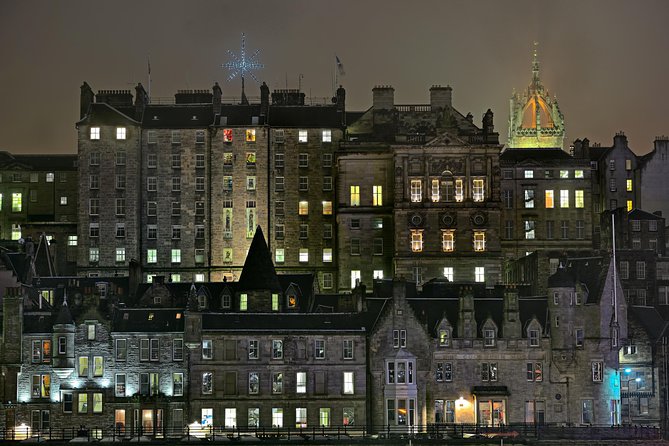
The tour can finish with something completely different: stargazing at the Royal Observatory. You’ll spend time looking up, with the note that it offers one of the best views of the whole city.
This ending is a strong contrast to pub-heavy parts of the night. It turns your final hour into a memory that’s about the city itself, not just drinks and streets. It also gives you a sense of Edinburgh as a place with scale—you see the pattern of the city instead of just the details of one corner at a time.
A consideration: stargazing experiences can depend on conditions. You’re still planning for a night activity, so dress for cool temperatures and be ready to adjust expectations based on sky visibility. Your guide can help you make the most of what you’ve got.
Price and value: is $241.32 per person fair?

At $241.32 per person for about 4 hours, this is not a budget tour. But the value isn’t just the walking and a couple stops. It’s the private guide time plus included drinks plus the fact that your route is shaped around your tastes.
Here’s what you’re getting that reduces your out-of-pocket planning:
- Private and personalized itinerary (not fixed, so you’re paying for decision-making)
- 4 hours with a host (guided interpretation, not just directions)
- Walking experience through nightlife neighborhoods
- 2 drinks of your choice at local bars
- Mobile ticket and an end point back at the meeting location
In practical terms: this price can make sense if you’d otherwise spend money (and time) booking separate activities, hunting down the right places, or paying for a guided experience plus your own bar stops. It also makes sense if your group wants a specific vibe—classic pub culture, live music, or a cleaner wine/cocktail pacing—without taking chances.
If you’re traveling solo and you mostly want a casual wander, you might prefer a cheaper group option. But if you care about getting it right and you want a guide who can tailor the whole night, this is more of a “time-saver” purchase than a simple sightseeing add-on.
What kind of night fits this tour best
This tour is a great match if you:
- Want a private local guide and don’t want to micromanage nightlife choices
- Enjoy pubs and bars, and like the idea of two included drinks
- Prefer to ask questions and get real answers about Scottish culture and history
- Like a mix of nightlife energy and a quieter, scenic finish at a top viewpoint setting
It may be less ideal if you:
- Don’t enjoy walking at night (you will be moving between stops)
- Want a long sit-down meal included (food isn’t included, only drinks)
- Prefer a fully predetermined itinerary with no flexibility (personalization means the places can vary)
How I’d use this tour to plan your whole trip
One smart way to get even more value: treat the tour like your nightlife and local-sight “briefing.” After your pub stops and your Royal Observatory finale, ask your host for recommendations for your remaining evenings—what to do next, what’s worth repeating, and what to skip.
The guides named Thomas and Tom stood out for exactly this kind of help: answering lots of questions and sharing extra ideas beyond the formal stops. That matters because Edinburgh can be oddly specific—some places are great for a quick pint, others suit a long evening, and not every “must-see” is worth your limited time.
If your goal is to avoid random trial-and-error, this tour is built to do that.
Should you book the Edinburgh Night Tour with a Local Guide?
I’d book it if you want a guided nightlife night with a confident local steering the choices, especially if you like mixing classic pubs with a memorable ending at the Royal Observatory. It’s a solid option when you’re short on time and don’t want to gamble on where you’ll end up.
I wouldn’t book it if you hate walking at night, you want a food-focused evening (since food and extra drinks aren’t included), or you’re looking for the cheapest possible way to see Edinburgh after dark. For many people, though, paying for private attention plus included drinks is the most straightforward way to get a great night without the stress.
FAQ
How long is the Edinburgh Night Tour with a Local Guide?
It runs for about 4 hours.
Where does the tour start and end?
It starts at Harvey Nichols Edinburgh (30–34 St Andrew Sq, Edinburgh EH2 2LL) and ends back at the same meeting point.
Are drinks included?
Yes. The tour includes 2 drinks of your choice in a local bar.
Is this a private tour?
Yes. It’s private, and only your group participates.
Do I need tickets for attractions?
Tickets to attractions are not included.
Is hotel pick-up available?
A hotel meet-up is available on request for a central location.
Can I cancel for a full refund?
Yes. You can cancel up to 24 hours in advance for a full refund, and cancellations within 24 hours are not refunded.
]]>Two things I like a lot: the guide connection to student life, and the mix of big-name sights plus smaller, walkable corners like the market area and local cafes. One thing to keep in mind is that the tour is only 1.5 hours, so it’s best if you want an efficient orientation rather than lingering all day at each stop.
Key things I’d plan around on this St Andrews walk
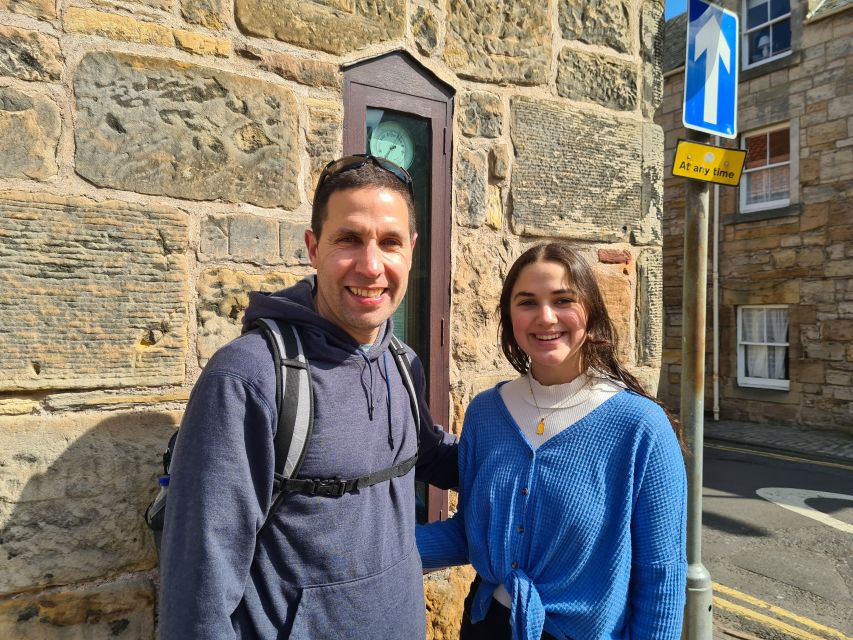
- A current student or recent graduate as your guide for practical answers about living in town
- Must-see St Andrews landmarks on foot including St Andrews Cathedral, the Castle, and the University
- Time for questions about student routines like where you’ll actually go and what to expect day to day
- A short, focused 1.5-hour route that works well for first-time visitors
- Meeting point right by Martyr’s Memorial on The Scores so you can find your guide easily
Meeting Martyr’s Memorial and getting your bearings fast
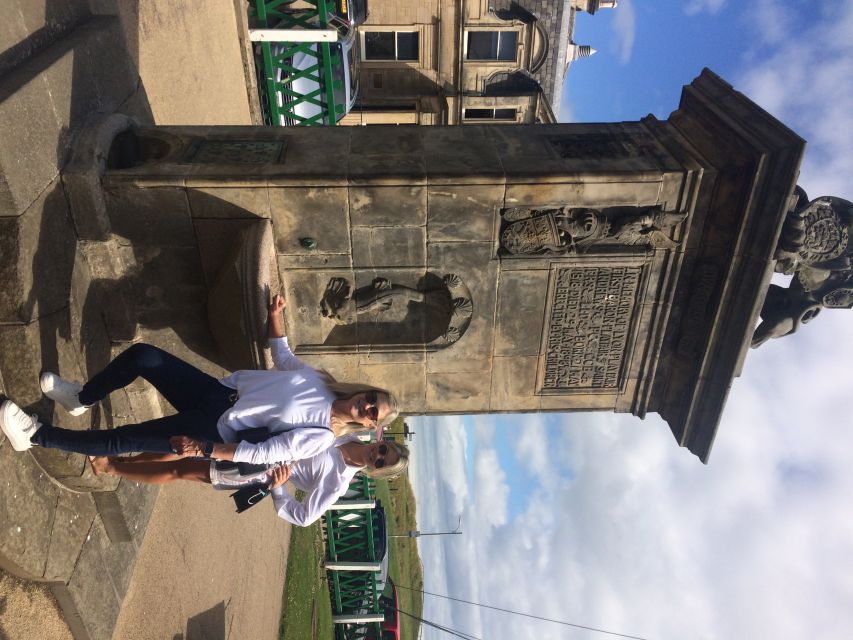
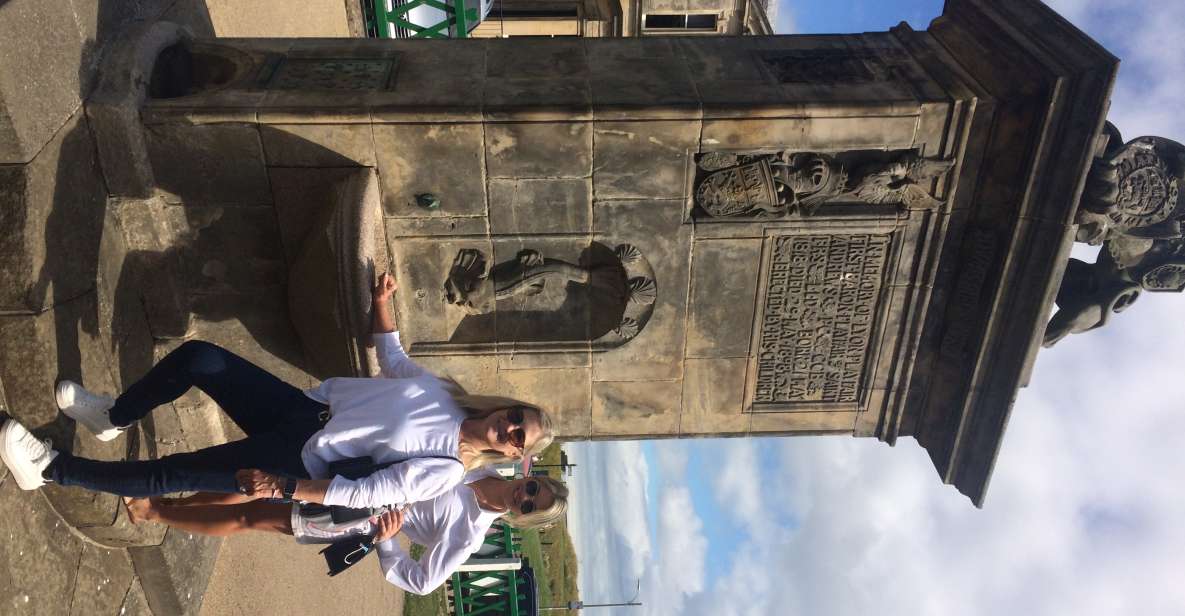
The tour starts beside Martyr’s Memorial on The Scores. Your guide wears an orange jacket and/or lanyard, so you’re not playing guess-the-guide in wind and drizzle.
From that point, the tone is set: you’re walking a central loop around the town and university. Even if you’ve read brochures, St Andrews makes more sense when you see how the historic sites relate to daily life. Expect conversation to be part of the walk from the start—questions are encouraged, and the goal is to help you picture yourself here.
I especially like starting at a place like The Scores because it immediately frames St Andrews as a lived-in coastal town, not just a museum. The walk gives you that first mental map you’ll use later when you explore on your own.
University of St Andrews: seeing the campus from a student’s angle
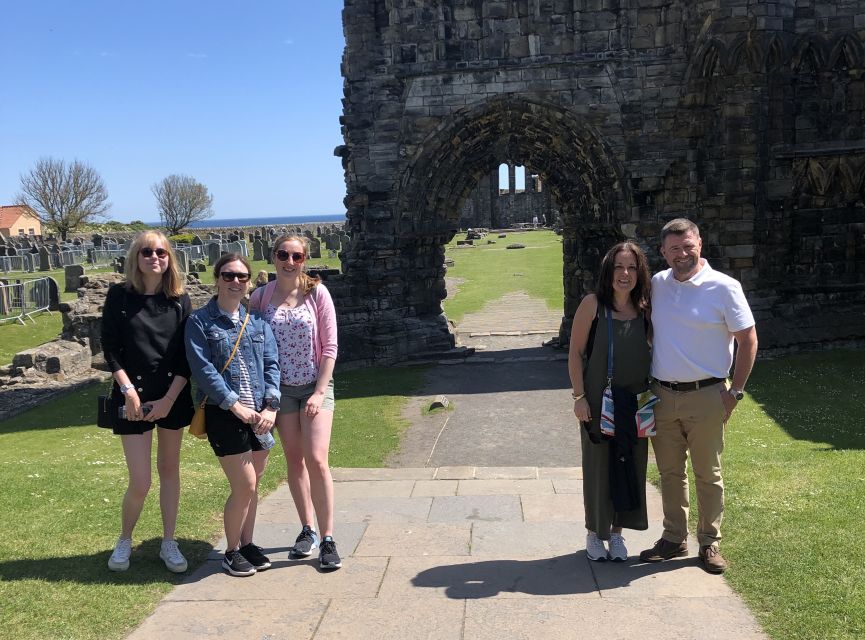
One of the strongest parts of this tour is that the University of Saint Andrews isn’t presented as a cold list of buildings. Your guide is a current student or recent graduate, so the conversation naturally turns to what matters: how it feels to move around campus, how life fits into the town, and what surprises students might not expect.
You’ll get context as you walk in the university area, with your guide tying the setting to student routines. That matters if you’re visiting for admissions reasons or deciding between options. You’re not just checking off a landmark—you’re testing how “real” the university feels as a place to live and study.
If you’re visiting with a parent/relative, this section is where the value really shows. You can ask questions you wouldn’t think to ask on a standard tour: what’s convenient, what’s annoying, and what people wish they’d known before arriving.
St Andrews Cathedral: where medieval power meets modern streets
Next up is St Andrews’ Cathedral, one of the town’s most recognizable historical anchors. Even if you only catch glimpses from the street, the Cathedral helps you understand the scale of what once shaped St Andrews. This is also where the story shifts from “pretty buildings” to the big themes—who held influence and how the town’s identity formed over centuries.
On a student-led walk, you’ll usually get explanations that feel practical, not just lecture-style. Your guide is there to make the history understandable without turning it into a memory test.
A possible drawback to note: if you’re the type who wants deep, stop-and-read archaeology level detail at each site, a 1.5-hour private walk may feel a bit fast. But if your goal is orientation plus insight, this stop is a smart use of time.
St Andrews Castle: thinking like a visitor, not a tourist
St Andrews’ Castle is the kind of site that changes how you see the rest of town. It adds a sense of the earlier “defend and control” era, and it helps you place the city in a broader historical rhythm.
What makes this effective on a walking tour is the pacing. You’re not just seeing a structure; you’re seeing it in relation to where you are. As you move through town, your guide can point out how the landscape and streets connect to the old story of power, religion, and conflict.
It’s also one of the stops that works well for photos, even if the weather is moody. Short walks around castles tend to be more forgiving than long drives between viewpoints.
The Old Course: golfing legends, and more than one kind of fame
You’ll also visit the Old Course area. This is where St Andrews’ reputation isn’t academic—it’s immediate. The Old Course is linked to golfing legends, and your guide can help connect that fame to the town itself.
What I like here is that it’s not just about golf. When your guide ties the Old Course to royals, heretics burned at the stake, or other famous characters associated with St Andrews, the story becomes bigger than sport. You start to see St Andrews as a place that drew attention—then and now.
One consideration: if you already know St Andrews mainly for golf and you’re hoping for a full tee-to-green explanation, you might find the tour more history-and-town focused than golf technical. Still, for a first visit, it’s a strong inclusion because it situates the sport inside the wider town identity.
Market area and cafes: where the student tips start to pay off
A walking tour is only as useful as what it helps you do afterward. That’s why I’m glad this one includes the market area and time around cafes. These aren’t just “nice stops.” They’re where you start thinking like a student: Where would I grab food quickly between lectures? Where would I meet friends? What feels normal day to day?
This is also where your guide’s insider value matters most. You’ll get suggestions for local spots and answers to questions about living as a student in St Andrews. Because your guide is currently in the system (or was recently), their advice is more likely to reflect actual routine rather than idealized impressions.
If you’re planning a visit ahead of an application or you’re trying to convince yourself that this town will work for your lifestyle, these cafe and market moments help you judge the vibe quickly. It’s not just about sights—it’s about where your time might go.
Hidden gems you can’t self-tour in the same way
The tour also promises hidden gems you wouldn’t discover on your own. You might not be getting a secret tunnel tour, but on foot in a historic town, small choices make a big difference. A student guide knows which side streets have the right atmosphere, which corners are worth a quick pause, and how to keep the walk moving without wasting time.
In practice, that means you get the key sights (University, Cathedral, Castle, Old Course) plus the little connective tissue that makes the town feel coherent. It’s the difference between ticking landmarks and understanding how everything fits together.
How much time you really get (and why 1.5 hours is smart)
This experience lasts 1.5 hours. That’s a short window, and it’s also a strength. On a first trip, you want enough time to learn where things are and ask your key questions, without draining the whole day.
I’d treat it like an orientation session. After this, you’ll be better equipped to explore on your own—because you’ll know what to circle back to.
If you’re traveling in a group of two (the private group price is for up to 2), this format also works well. One person can ask questions while the other focuses on landmarks, then you swap roles.
Price and value for a 1.5-hour private student walk
The price is $197 per group (up to 2 people) for 1.5 hours. For a private guide, that’s not a budget deal, but it can be good value if the goal is targeted information.
Here’s the value logic: you’re paying for (1) a local student/recent graduate guide, and (2) a guided route that hits the big St Andrews highlights plus student-life conversation. If you were to assemble that value on your own, you’d be stitching together a history guide, a walking route, and student tips from forums. That’s slower, less personal, and often less current.
So for me, the “worth it” test is simple: if you’re seriously considering studying at St Andrews, you’ll likely use the Q&A and advice immediately. If you’re only doing a quick sightseeing stop and don’t care about student life, you might prefer a more general tour.
What to bring for St Andrews weather and comfort
St Andrews weather can turn fast, so plan for walking. Bring comfortable shoes and weather-appropriate clothing. Since the tour is on foot and lasts 1.5 hours, your comfort matters more than you might think—especially if you’ll want to stand still at major landmarks while your guide explains context.
If you’re visiting in colder or wetter months, layers help. You’ll be happiest if you don’t spend half the time thinking about your feet or your sleeves.
Who this tour is for (and who should skip it)
This is a good fit if:
- You or a loved one is considering St Andrews University and wants a real-feeling preview.
- You like guided history, but you also want practical living info from someone close to the student experience.
- You want a private, flexible walk where you can ask questions.
It’s less ideal if:
- You want a long, detailed museum-style tour of each landmark.
- You’re coming only for golf or only for medieval sites and don’t care about the student-life angle.
A quick note on the guides and vibe
The tour is led by a live English guide, and the “student perspective” is the core selling point. One review highlighted Verity specifically, describing her as kind, energetic, and enthusiastic about the university. That lines up with what you’d want from this type of tour: clear explanations, real enthusiasm, and answers that sound lived-in rather than scripted.
Should you book this St Andrews student-led walking tour?
If you’re visiting St Andrews with an admissions mindset, I’d book it. The private format, the student/recent graduate guide, and the mix of University, Cathedral, Castle, and the Old Course are exactly the ingredients you need for a first “could I live here?” reality check.
Skip it only if you already feel confident about where everything is and you don’t care about student-life tips. Otherwise, this is one of the smartest ways to get more than photos out of a short visit—because you leave with both landmarks understood and questions answered.
FAQ
How long is the St Andrews private guided walking tour?
The tour lasts 1.5 hours.
How many people is the private tour for?
The group is private and priced for up to 2 people.
Where do we meet the guide in St Andrews?
Meet your guide beside Martyr’s Memorial on The Scores. The guide will be wearing an orange jacket and/or lanyard.
What sights are included on the walking tour?
Key sights include the University of Saint Andrews, St Andrews’ Cathedral, St Andrews’ Castle, and the Old Course, plus stops around the market area and cafes.
What language is the tour guide?
The live tour guide speaks English.
Is the tour wheelchair accessible?
Yes, the tour is listed as wheelchair accessible.
What should I bring?
Bring comfortable shoes and weather-appropriate clothing.
What is the cancellation policy?
The tour offers free cancellation up to 24 hours in advance for a full refund.
]]>The one thing to plan for is reality: some filming locations may be closed due to filming schedules, restoration work, or other issues outside the operator’s control. That won’t ruin the day, but if a specific stop is your must-see, you should say so early so they can check access ahead of time.
Key Points at a Glance
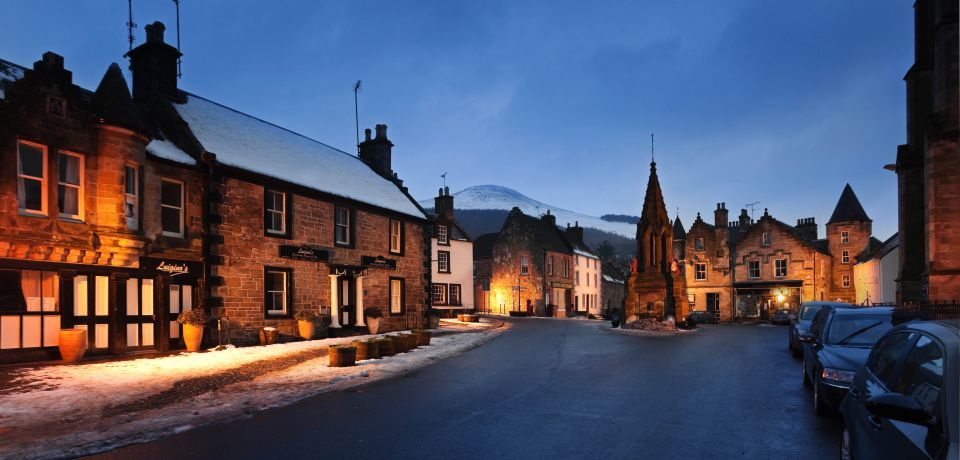
- Outlander location set-list: you’ll visit named series spots such as Castle Leoch (Doune Castle), Wentworth Prison (Linlithgow Palace), and more
- Private, tailored routing: the day is adjusted around your interests, not a one-size-fits-all bus loop
- Bilingual guide support: English and Portuguese are available, but language availability depends on guide resources
- Comfort on the way: an insured vehicle, plus the guide’s on-the-road touches can make the vibe feel very on-series
- Photo time built into the flow: you’ll have chances to stop and take pictures at each major sight
Why This Private Outlander Tour From Edinburgh Works
A lot of Outlander trips in Scotland are built around speed and crowds. This one flips that. Because it’s private, you move through the day with less friction and more attention on the places that matter to you.
I also like how the tour is straightforward about what it’s trying to deliver: iconic castles and on-screen locations, plus the option to steer the route toward your favorite themes. That matters because Outlander fans can be fiercely different—some want romance-and-views, some want gritty prisons and palaces, and some just want the “I can’t believe I’m here” photo moments.
The best part is the guide. In one recent booking, the guide was Maurício, who arrived on time, explained the context clearly, and kept the day moving so the group could see all the named locations with time to photograph each stop. If you want a day that feels personal rather than rushed, this is the right setup.
The Route You’ll Follow: Doune Castle, Culross, Linlithgow Palace, Midhope, Blackness, Falkland, and Sandringham
This is a full-day drive that ties together Outlander’s major Scotland filming sites. From Edinburgh, you’re set to visit locations that the series uses as:
- Castle Leoch (Doune Castle)
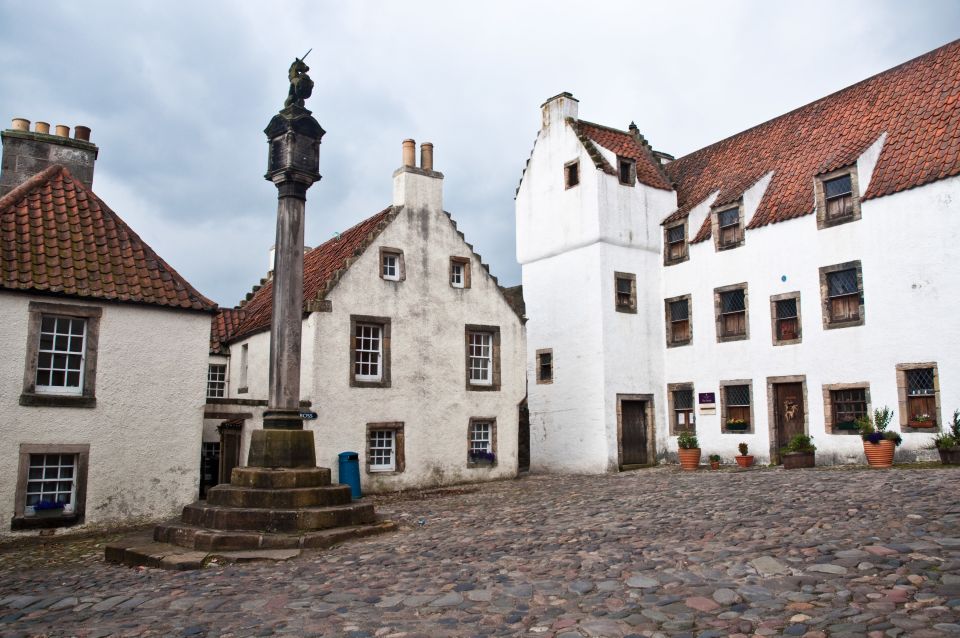
- Cranesmuir (Culross, Fife)
- Wentworth Prison (Linlithgow Palace)
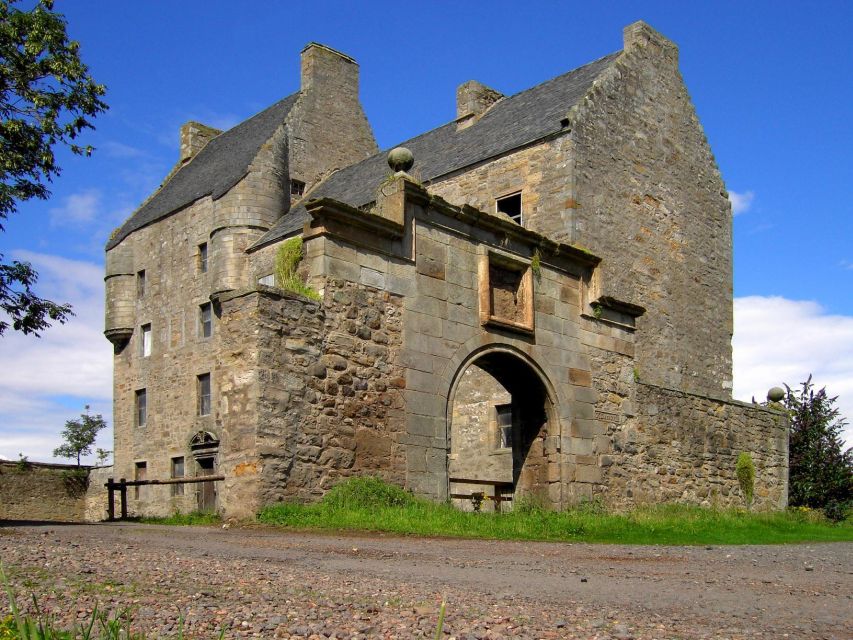
- Lallybroch (Midhope Castle)
- Fort William (Blackness Castle)
- Inverness (Falkland, Fife)
- The Duke of Sandringham’s residence
A practical note: the operator flags that some attractions may not be open because of filming, restoration, or other factors. If there’s a single stop that would make or break your day, tell them ahead of time. They can then check access and advise what’s realistic.
Castle Leoch at Doune Castle: The Big-Setting Start
The day’s energy starts with Castle Leoch (Doune Castle). This stop is valuable because it gives you an immediate anchor—your brain already knows the look from the show, so the visit becomes more than sightseeing. It turns into recognition.
What you’ll like here is the way a private setting makes the moment easier to enjoy. You’re not fighting for a turn, and you can take your time composing photos and scanning the surroundings without feeling like you’re holding up a long line.
The only drawback is the timing reality of an 8-hour day. Even if the stop is a highlight, you still have other named locations ahead. If you love this one the most, you’ll get better results by building your photo plans before you arrive—phone charged, camera ready, and a quick list of the shots you want.
Cranesmuir in Culross, Fife: A Compact Place With Show-Spot Attention
Cranesmuir is represented by Culross, Fife. This stop tends to appeal to the fans who love the small-town feel of the series—streets, buildings, and the kind of scenery that makes the story world feel close.
Because this tour is private, you can slow down slightly at the places that catch your eye. If you prefer atmospheric wandering rather than a checklist, this is one of the better parts of the day to focus on.
Keep expectations grounded, though. This is still a drive-and-stop format. You’ll want to treat it like a series of photo-and-walk moments rather than a full day of roaming on foot with no pressure.
Wentworth Prison at Linlithgow Palace: When the Story Turns Serious
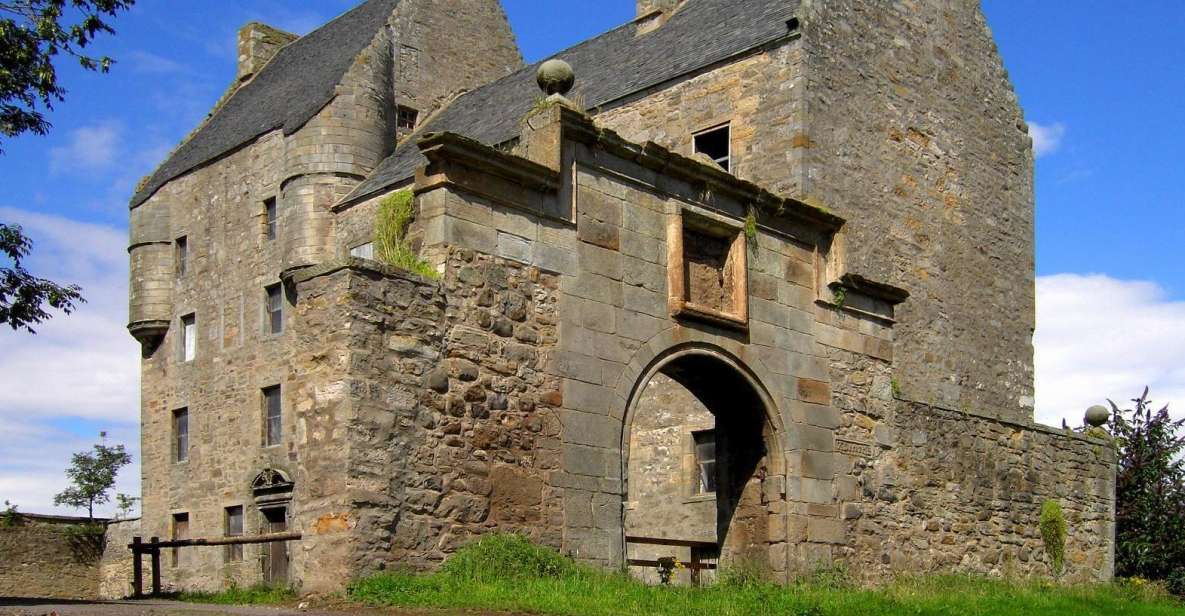
Wentworth Prison is linked here with Linlithgow Palace. If your favorite Outlander moments lean toward tension, power, and historical heft, this is the stop that tends to land hardest.
I like this part of the tour because it adds contrast. You move from castles and story locations into a more serious setting, which helps the day feel like a real narrative—rather than a set of random pins on a map.
The main consideration is access. The operator clearly warns that some attractions may not be open due to filming or restoration. So for this type of location, it’s smart to ask what’s possible on your specific date. If entry isn’t feasible, you can still enjoy the exterior and the guide’s explanation, but it helps to know the odds in advance.
Lallybroch at Midhope Castle: Getting the Emotional Reference Point Right
Lallybroch is represented by Midhope Castle. This is the stop that many people connect with on an emotional level, because it’s where the show’s homey, grounded energy shows up.
A private tour helps here because the guide can tailor the commentary to what you’re most interested in—backstory, setting, or simply pointing out the visual matches you’ve seen on screen. That can turn Lallybroch from a pretty castle stop into an “I get it now” moment.
One practical thought: castles and historic sites can mean uneven ground and outdoor walking. You don’t need hiking boots, but comfortable shoes matter. Bring layers too. Scotland weather can change fast, and you’ll be outside during photo breaks.
Fort William as Blackness Castle: A Strong Visual Payoff
Fort William is covered via Blackness Castle. This stop is often the visual payoff part of the day for Outlander fans, because castles in big sky light just photograph well.
What makes it feel worthwhile is how the day is arranged. You’ve seen multiple named locations already, so you’re not only collecting places—you’re building a feeling for how the series translates Scotland into its world.
The drawback is simple: photo-heavy stops can eat time. The tour still aims to hit multiple sights, so it’s worth staying flexible. If you linger too long on one angle, you may shorten your time at the next. A guide who’s thinking ahead can manage this, and that’s where professional guiding really matters.
Inverness via Falkland, Fife: Seeing the World Behind the Show
Inverness is represented by Falkland, Fife. This is a great stop for people who like history settings but also enjoy walking at a human pace—because it can feel less like a fortress moment and more like the show’s “place you could live in” vibe.
I especially like this stop on private tours because you can ask questions. You’re not stuck with one loud explanation for the entire group. You can focus on the details that make a location feel like Inverness to you personally.
If you’re the type who cares about specific filming continuity, you’ll want your guide’s attention here. Tell them what you’re looking for, and they can point you toward the best places to observe and photograph during your time window.
The Duke of Sandringham’s Residence: Filling In the Other Pieces of the Puzzle
The Duke of Sandringham’s residence rounds out the set of named stops. Even if you’re not the most focused on this particular storyline, it helps the day feel more complete—less like you only visited the biggest hits and more like you followed the show’s geography.
On a practical level, it also balances the pacing. By the time you reach this part of the day, you’ve already gathered visual references from the major castles. This is often where the tour can shift from big dramatic recognition to subtler story-location connections.
Again, watch for closures. The operator’s policy about access applies to the whole set of locations, not just one or two. If this is a top priority, flag it so they can confirm feasibility and avoid disappointment.
Private Means Tailor-Made: How Your Guide Adjusts the Day
The pitch here isn’t just private—it’s tailor-made. The operator explicitly says the tour can be adjusted according to what interests you most. That’s huge for Outlander tours, because people’s priorities vary wildly.
If you want more time for photos, you’ll likely get it. If you care more about story context and explanations, you’ll want a guide who talks through connections and helps you see what you’ve been imagining from the show.
Also, language matters. The tour offers English and Portuguese, but they caution that language availability depends on the guides they have. So if Portuguese is important for you, request it when booking. That’s not a minor detail—it’s often the difference between a good day and a truly comfortable one.
Comfort on the Road: Insured Vehicle, Snacks, and Outlander Music
This tour includes an insured vehicle and a professional guide, and you’re picked up from any hotel in Edinburgh’s New or Old Town. That’s convenient. It reduces the stress of meeting points and helps you start the day smoothly.
One small touch from a recent Outlander-fan booking stood out: the car was comfortable, clean, and the guide had water and snacks. It also included Outlander music along the way. That kind of soundtrack doesn’t just entertain—it helps you transition into the story-world as you move between locations.
You can also use this to your advantage. Bring your own small extras too—like a refillable water bottle if you run through snacks fast. While the tour provides water and snacks in the vehicle per the review, it’s still smart to plan for your own pace.
Price and Value: Is $1,017 Per Group Worth It?
The listed price is $1,017 per group, with the group capped at up to 1. That pricing structure means you’re paying primarily for privacy and a guide-led route, not for a bargain per person.
So is it worth it? For the right person, yes—because you’re buying three things that public tours often struggle with:
- A named-location Outlander route: you’re not piecing together sites yourself
- A professional guide: you can get context instead of just walking around
- Time flexibility: the tour can be adjusted based on your interests
Food and drink aren’t included, and admission to tourist attractions isn’t included. That part matters for budgeting. When you compare options, look at the total day cost: base tour price plus admissions plus what you’ll eat. If you plan to add multiple indoor entries, those extras can add up.
Still, the value calculation changes if you’d otherwise spend time trying to coordinate transport, booking tickets, and building an efficient route. If you want one coherent day focused on Outlander locations, the cost can feel less painful than it first appears.
What to Know Before You Go (So the Day Stays Fun)
Before you book, I’d think about three practical issues.
First, choose your priorities. The operator says some locations may not be open and asks you to tell them which attractions are important. Do that. Send the must-sees so they can check ahead.
Second, plan for an 8-hour day. That’s a lot of Scotland on wheels and a lot of stop-and-photo time. You don’t need to treat it like a marathon hike, but you should expect to be outside and walking around intermittently.
Third, language availability should be confirmed in your mind. They’re bilingual (English and Portuguese), but they don’t have unlimited guides who speak every language. If your comfort depends on Portuguese (or English), make a clear request when booking.
Finally, bring weather sense. Even if the forecast looks fine, Scotland can change quickly. Layers and a light rain shell are an easy win.
Should You Book This Outlander Private Tour?
I’d book this if you fit one of these profiles:
- You’re an Outlander fan who wants the filming-location hits in a smooth one-day plan
- You want a private, guide-led day where the route can match your interests
- You’d value comfort and organization over crowds and group timing
I wouldn’t book if you need guaranteed access to every location indoors on your exact date. The operator warns closures can happen due to filming and restoration, and that can limit entry even if you still see the places.
If your top priority is one or two specific stops, you can still make this work well—just tell them what you care about most so they can check access.
Bottom line: this is a strong choice for fans who want a guided, tailored Outlander day from Edinburgh, with the kind of on-road touches that make it feel like more than sightseeing.
FAQ
What Outlander locations does the tour include?
The tour includes Castle Leoch (Doune Castle), Cranesmuir (Culross, Fife), Wentworth Prison (Linlithgow Palace), Lallybroch (Midhope Castle), Fort William (Blackness Castle), Inverness (Falkland, Fife), and the Duke of Sandringham’s residence.
How long is the tour, and where is pickup?
It lasts 8 hours. Pickup is included from any hotel in Edinburgh New Town or Edinburgh Old Town, and starting times depend on availability.
What languages are available for the guide?
Live tour guidance is available in English and Portuguese. The operator notes that guide availability can vary, so you should request your preferred language when booking.
What’s included in the price, and what’s not?
Included: a full-day private tour, a professional guide, and an insured vehicle. Not included: food and drinks, and admission to tourist attractions.
What if a filming location is closed during your visit?
Some attractions may not be open due to filming, restoration work, or other reasons outside the operator’s control. If a specific location is important to you, they recommend you tell them so they can check ahead.
Is there free cancellation?
Yes. You can cancel up to 24 hours in advance for a full refund.
]]>This is built as a straightforward first-canyoning experience: you get outfitted, you’re led by a fully qualified guide (1 guide to 8 clients), and you spend the afternoon doing actual canyon moves, not just watching. Expect to get wet, and expect to work your way through the canyon with basic fitness and a positive attitude toward cold water.
You also need to plan around what’s not included. Towels and food and drink are on you, and there are clear physical limits (like a 38-inch waist max for harness fit).
Key things that make this Lower Falls of Bruar canyoning special
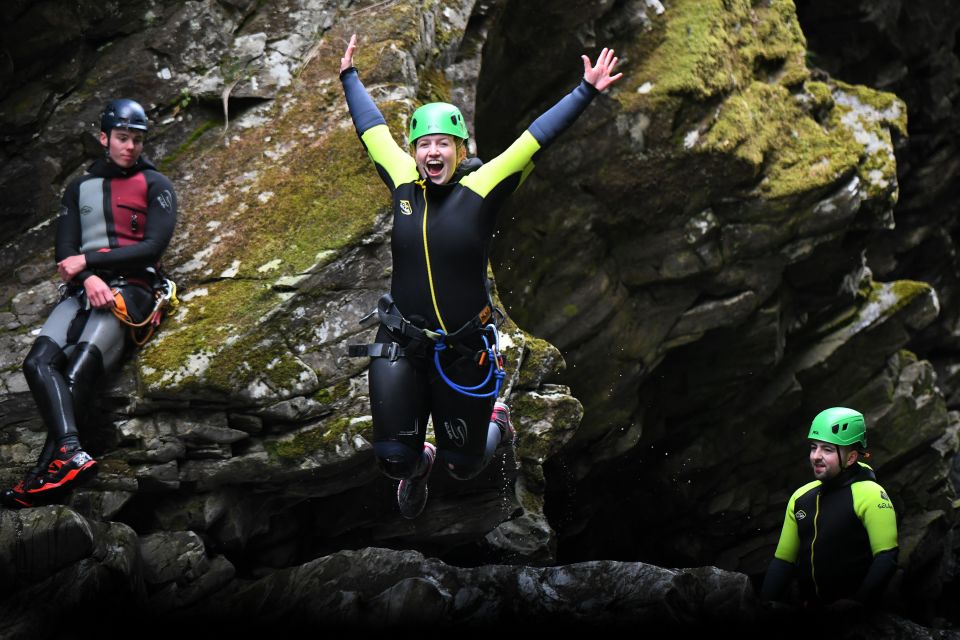
- One of Scotland’s best canyoning setups at the Lower Falls of Bruar, with classic canyon moves: abseils, jumps or slides, climbs, and swims
- Small group ratio (1 qualified guide to 8 clients), which matters when you’re learning technique and moving through water and rocks
- Proper heating changing rooms, toilets, and an on-site café at the water base so you can warm up and regroup
- Full gear included: canyon wetsuit and jacket, harness, helmet, and PFDs, so you’re not shopping for equipment first
- You need to be a harness-fit match (max 38-inch waist), plus reasonable fitness and no fear of heights
Lower Falls of Bruar: why this is such a good canyoning intro

If you want canyoning in Scotland without it turning into a stressful logistics puzzle, the Lower Falls of Bruar is a strong starting point. The canyon is set up for a guided experience where you get to try multiple styles of movement in one outing. That’s rare. Most activities either focus on one thrill (like only abseiling) or they stay too gentle to feel like real canyoning.
Here, the mix is the point. You’ll abseil down sections, you’ll slide and climb your way through the rock, and you’ll swim in natural pools as the water course funnels you from move to move. That rhythm is what makes the experience feel like a natural waterpark, but with real rope-and-safety technique behind it.
Also, the Bruar Falls views aren’t an afterthought. They come with the descent and help you stay present. When you can see where the water is moving and why you’re following the route, you’re less likely to get mentally stuck when you’re up on the rock with a harness on.
Meeting at Nae Limits and your 3-hour flow
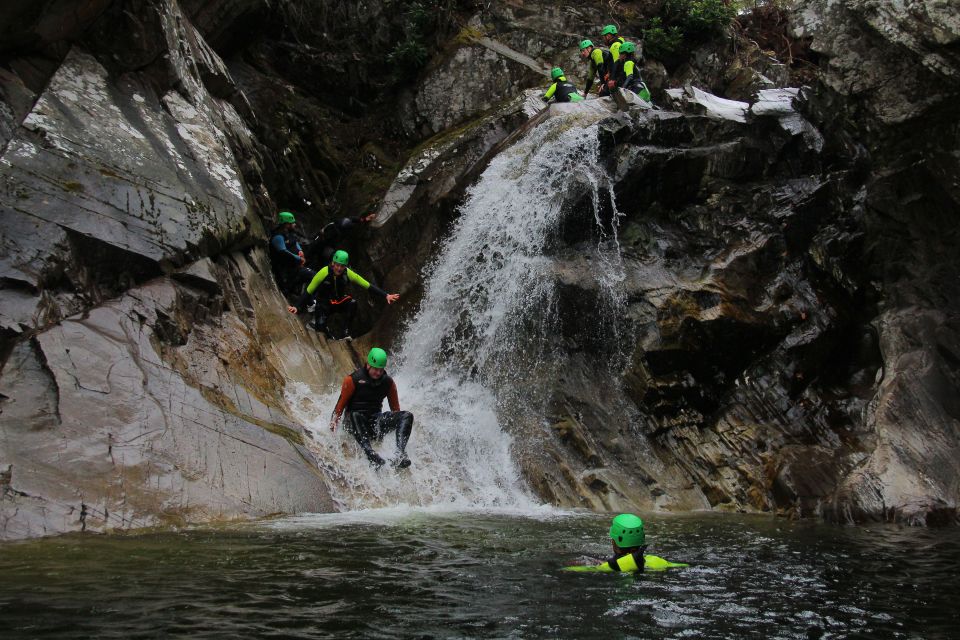
The day starts at Nae Limits, Old Military Road, Ballinluig, Logierait, Pitlochry PH9 0LG. This is a practical setup because the activity ends back at the same meeting point. You don’t need to figure out transport back to Pitlochry after you’re wet, cold, and slightly proud of yourself.
The duration is listed as 3 hours (starting times vary by availability). In that window, the experience is designed to include the full cycle: gearing up, travel to the water base/canyon area, the canyon moves themselves, and the return. If you’re planning your Pitlochry schedule, it’s the kind of activity that fits well between other local plans because you’re not committing to a full half-day plus travel buffers.
One detail that helps your planning: the guide is responsible for the route and the group. You’re not running around looking for the next handhold or worrying about who’s behind. That reduces decision fatigue and lets you focus on learning the skills safely.
Gear on: harness, wetsuit jacket, helmet, and your fit requirements

This is one of those activities where “included gear” matters a lot. You get the canyon wetsuit and jacket, plus the harness, helmet, and PFDs. That reduces cost up front and also helps you avoid common mistakes like wearing the wrong swimwear or trying to cobble together a harness-friendly outfit at the last minute.
But there’s also a clear fit rule you should respect. You must not exceed a 38-inch waist to fit the canyoning harness. That means you should check yourself early, not after you arrive. It’s the difference between having fun and having to sit out.
A couple more practical notes from the activity info:
- Bring swimwear, because you’ll wear it under the wetsuit.
- Wear sports shoes (not flip-flops).
- Bring personal medication if you need it.
The whole setup is meant to keep you moving safely in water and on rocks. The harness and helmet do their job best when you’re properly sized and comfortable with the equipment.
Inside the canyon: abseils, slides, climbs, and pool time
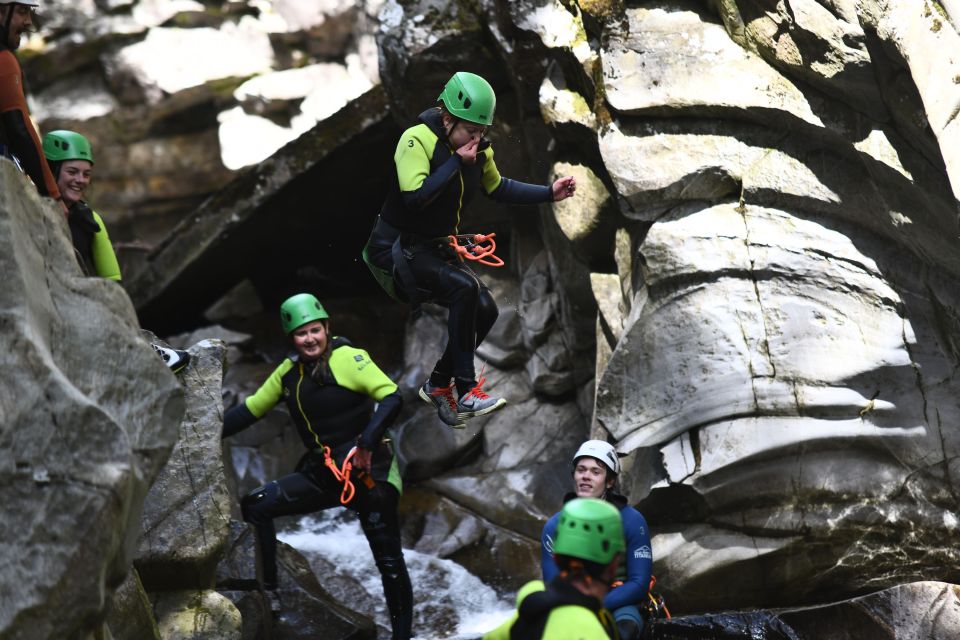
The Lower Falls of Bruar experience is built around action. You’ll use rope skills for abseils, you’ll take advantage of slides and jumps where appropriate, and you’ll climb rock sections to reach the next stage. And yes, you’ll spend time swimming in natural pools.
Here’s what I think matters most for your expectations: canyoning isn’t just about the big moment. The fun comes from the chain of challenges. You’ll move from one type of obstacle to the next while the water around you keeps shifting. That’s why people tend to call this a natural waterpark. The difference is that each “ride” has real technique behind it.
You should also know the environment can be physically demanding even if you’re not a “gym athlete.” Basic level of fitness is required, and that usually translates to being able to:
- keep your balance while wet
- pull yourself along a rock surface when needed
- tolerate cold water and keep moving
If you can handle climbing carefully and you’re okay getting soaked, you’ll have a much better time.
And the views of the Bruar Falls help anchor the experience. You’re not just staring at rope and footholds. You’re also seeing the shape of the waterfall system and understanding how the route follows it.
Safety and guide style when you’re learning on real water
This outing is led by experienced adventure guides, and the ratio is 1 fully qualified canyon guide to 8 clients. That small group size is a big deal for a beginner-friendly experience. It means you get closer attention when you’re adjusting to the harness, learning how to move on wet rock, or taking guidance before you commit to a tricky section.
It also makes the day feel more controlled. In bigger groups, you can spend time waiting, guessing, or feeling rushed. Here, the guide can keep everyone progressing in a steady flow, which helps your confidence.
If you’re nervous about heights, this is a clear warning sign. The activity is not suitable for people afraid of heights. That rule isn’t “bureaucratic.” Abseils and elevation-based moments are part of what makes this canyoning experience what it is.
Likewise, if you have previous injuries or health issues, you should make the guides aware. The activity info specifically asks you to let them know, because injuries can affect grip strength, mobility, and how your body handles awkward positions in and out of water.
What to pack (and what to leave out) for a wet Scottish canyon
You’re going to get wet. So your packing plan should focus on staying warm and comfortable before and after the canyon.
Bring:
- swimwear
- towel
- sports shoes
- personal medication
Plan to dress with the wetsuit in mind. The wetsuit and jacket are included, but your swimwear is what you’re wearing underneath. Also, sports shoes help with stability around the water base and rock areas.
What not to count on:
- towels are not included
- food and drink are not included
The good news is that the water base has male and female heating changing rooms and toilets, plus an on-site café. That’s a practical pairing: warm changing space plus the ability to get food after you’re done, without hunting for a shop while you’re still cold and damp.
Weather reality in Perth and Kinross: cold water, real comfort

This is Scotland, and canyoning means you’re dealing with water temperature and wind. Even with wetsuits and jacket gear provided, you should expect a chill, especially right at the start and if you’re waiting between segments.
That’s why the included heating changing rooms matter. Warmth isn’t a luxury here; it’s part of the experience design. After you finish the canyon moves, you’ll want to dry off and warm up quickly so you can enjoy the rest of your day instead of shivering through it.
If you’re the type of traveler who runs cold, wear your confidence as layers. You can’t change the water temperature, but you can control how you handle the transition from wet to dry.
Price and value: is $87 a fair deal for 3 hours of canyoning?
The price is listed at $87 per person, and you get a lot for that time. You’re paying for instruction, supervision, and the safety equipment that makes canyoning possible.
Included value points:
- all your canyoning gear (wetsuit and jacket, harness, helmet, and PFDs)
- transport to and from the canyon/water base
- experienced adventure guides
Not included (so you can budget):
- towels
- food and drink
- accommodation pick up and drop off
So the real question is your total trip cost, not just the headline price. If you’re staying near Pitlochry, you’re usually fine. But if you need hotel pickup, the activity explicitly doesn’t include that. You’ll also want to bring a towel and plan where you’ll eat afterward.
For a 3-hour experience that includes multiple big skills in one go, plus transportation and full gear, $87 feels like a solid value. It’s the kind of “one-and-done” adventure that’s hard to recreate on your own safely, especially as a beginner.
Who should book this Lower Falls of Bruar canyoning?
This is ideal for you if:
- you want a guided introduction to canyoning with a real mix of skills
- you’re okay getting wet and you like hands-on activities
- you have basic fitness and can follow safety instructions while you’re learning
- you can meet the harness fit requirement (max 38-inch waist)
- you’re comfortable with the heights aspect (no fear of heights)
It’s a poor match if you are:
- under 12 years old (minimum age is 12)
- pregnant (not suitable)
- using a wheelchair or have mobility impairments (not suitable)
- afraid of heights
- after recent surgeries (not suitable)
- over 254 lbs (115 kg)
- unsure about your health situation and unwilling to tell the guides
The best way to decide is to be honest about the heights component and your comfort level moving on wet rock. If you’re good with those, the rest tends to fall into place fast.
Should you book this Nae Limits guided canyoning in Pitlochry?
Yes, if you’re looking for a Scotland canyoning experience that’s action-packed and beginner-friendly in structure. The small guide-to-client ratio, full gear, and the fact you return to the meeting point make it feel manageable. You also get heating changing rooms and toilets at the water base, which helps a lot when the day ends wet and cool.
Don’t book if you know you’ll struggle with heights or if you don’t fit the harness waist limit. And make sure you bring the basics (swimwear, towel, sports shoes, and any medication you need). If you do that, this is the kind of trip that turns a waterfall view into actual rope skills and pool time.
FAQ
How long does the Lower Falls of Bruar guided canyoning experience take?
The activity duration is 3 hours. Starting times depend on availability.
Where do I meet for the canyoning experience?
Meet at Nae Limits, Old Military Road, Ballinluig, Logierait, Pitlochry PH9 0LG, UK.
What time does the activity end?
The activity ends back at the meeting point.
What is included in the price?
All canyoning gear is included, along with transport to and from the canyon and experienced adventure guides.
What should I bring with me?
Bring swimwear, a towel, sports shoes, and any personal medication.
Are towels included?
No, towels are not included.
Is accommodation pickup or drop-off included?
No, accommodation pickup and drop-off are not included.
What are the age and fitness requirements?
The minimum age is 12, and a basic level of fitness is required.
Are there weight or harness size limits?
Yes. You must not exceed 254 lbs (115 kg), and you must not exceed a 38-inch waist to fit the canyoning harness.
Is it suitable for people afraid of heights or who are pregnant?
No. It is not suitable for people afraid of heights, and it is also not suitable for pregnant women.
]]>One thing to factor in: it’s a 3.5-hour, mostly on-foot experience, and it runs with a strict 18+ policy. If you want a slow, purely scenic walk, the pacing and the age limits may not be your best match.
Key points at a glance
- Tron Kirk Market start on the Royal Mile makes it easy to find on foot, near Waverley Station
- Greyfriars Kirkyard + Tom Riddle’s Grave connection gives the Old Town a darker edge
- Victoria Street is highlighted as a Diagon Alley inspiration viewpoint
- The Elephant Café stop is a must for anyone who loves Rowling’s origin story
- Underground gin tasting in the Lost Close turns the final stretch into a night out
How this Harry Potter origins walk actually feels
This combo tour is built for people who want Edinburgh to feel like part of the wizarding story, not just a backdrop. The first half is a 2-hour guided walking loop across Old Town and nearby areas, with stops chosen for their connection to Rowling’s ideas. After that, you get a 1.5-hour-style gin experience underground at The Lost Close, guided by a gin expert.
I like the pacing here because it mixes story with movement. You’re not stuck in one spot listening the whole time. Instead, you walk between viewpoints that help you place the scenes: gates, streets, courtyards, and the famous angles of Edinburgh’s historic center.
And that second half matters. A gin tasting isn’t just sampling alcohol. It’s a change of setting, going from daylight streets to an underground bar experience described as deep, atmospheric, and made for a fun evening kickoff.
Starting at Tron Kirk Market on the Royal Mile

You’ll meet outside Tron Kirk Market, opposite Bella Italia, right on the Royal Mile. This matters for two reasons. First, it’s an obvious meeting point for first-time visitors who are already orienting themselves around the main tourist spine of Edinburgh. Second, it connects you naturally to the rest of the route, which starts with a short walk along the Royal Mile before shifting toward major landmarks.
The nearest train station is Waverley Station, about a 10-minute walk. If you’re arriving by rail, this tour is simple to plug into your day without a complicated transit plan.
Also note the basic rules that affect logistics: there’s no hotel pick-up or drop-off, and luggage or large bags aren’t allowed. If you’re traveling light, you’ll enjoy this more. If you’re hauling a suitcase, you’ll waste energy dealing with it rather than enjoying the story.
Royal Mile to Waverley Station: the city’s early momentum

The first stretch is short and practical: a 15-minute guided walk along the Royal Mile. Then you move to Edinburgh Waverley Train Station for about 10 minutes of sightseeing and guide-led context.
Why this stop is smart: Waverley Station isn’t just a transit hub. It’s the kind of landmark that makes visitors slow down and realize Edinburgh is both historic and alive. For a Harry Potter origins tour, that blend helps. The guide can connect the sense of place to how Rowling’s ideas took shape in real, walkable parts of the city.
You’ll also be getting into the rhythm of the tour. The group size is limited to 10, so you can usually hear the guide without struggling. That’s a big deal on crowded streets.
Old Town and New Town contrast: why it helps the story

After Waverley Station, the route shifts briefly through Edinburgh New Town (about 10 minutes of guided sightseeing and walking). New Town is part of what makes Edinburgh feel distinct: tidy, elegant streets side-by-side with the more atmospheric, story-heavy Old Town you’ll spend most of your time in.
Then you move into Old Town for a longer stop (about 20 minutes). This is where the tour leans into atmosphere. Old Town isn’t just pretty from a distance. It’s the kind of place where narrow streets, stone walls, and hidden corners make it easy to picture fictional locations.
If you like “real places that spark imagination,” this contrast is a big reason this tour works. You’re not only learning facts. You’re also learning how the city’s layout shapes what you see when you walk.
Old College at the University of Edinburgh: a school that fits the myth

One of the most specific and satisfying stops is Old College, The University of Edinburgh. You’ll spend around 10 minutes here with guided sightseeing.
The tour emphasizes this as a famous old campus that provided inspiration for Rowling’s creations. Even if you’re not a campus-explorer, this is a good stop because it gives you a recognizable type of place: grand institutional buildings where students, rules, and rumors naturally feel like they belong in a story.
If you’re a Potter fan who likes the behind-the-scenes “where did the idea come from” angle, this is one of your best opportunities. It grounds fantasy in architecture and everyday city life.
Greyfriars Kirkyard and Tom Riddle’s Grave

Greyfriars Kirkyard is a key stop on this route (about 20 minutes). The tour frames it as an inspiration tied to Tom Riddle’s Grave.
This part feels different from the lighter, postcard-like stops. It’s the kind of cemetery setting that already carries dramatic mood, even before you connect it to the series. Having a guide explain the connection helps you see why it stuck in the cultural imagination.
Practical tip: cemeteries and kirkyards are often uneven. Wear footwear that won’t punish you for an extended period of walking and standing, especially if you’re visiting in cooler months.
Elephant Café: where Rowling’s early stories began

If you love Rowling’s origin story, plan to pay attention at the Elephant Café stop. The tour highlights it as the place where she sat for many hours dreaming up early Harry Potter stories.
This is one of those stops that works on two levels. On one level, it’s pure fandom. On the other, it’s a useful reminder that creative work often happens in ordinary places with familiar routines: a seat, a view, a table, and hours of writing.
Even if you’re not trying to do a coffee pilgrimage, this stop gives you a human scale to the magic. It turns the whole tour from a series of sights into a story about process.
Edinburgh Castle views and Victoria Street for Diagon Alley vibes
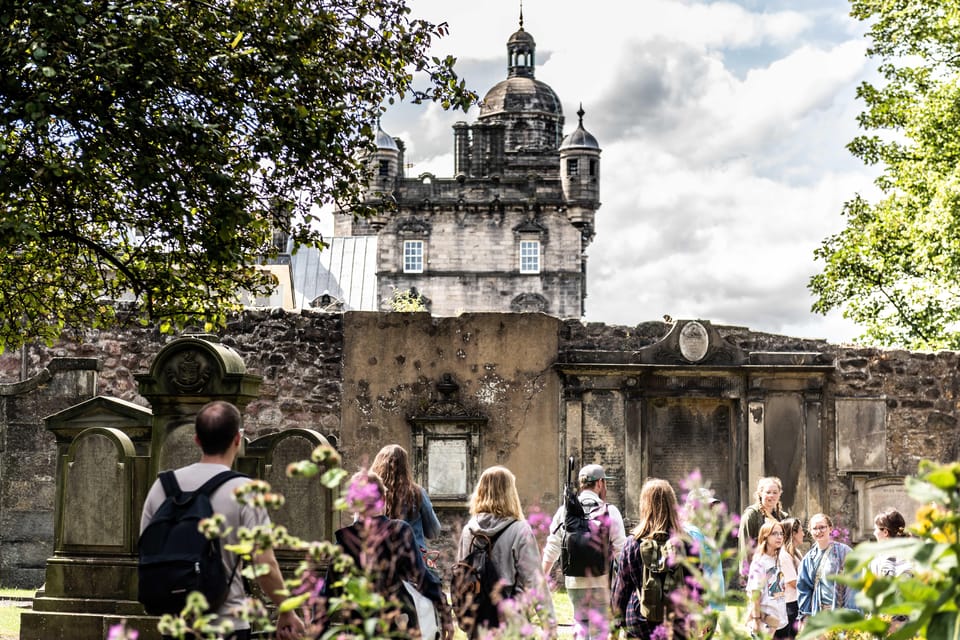
As you work your way toward Victoria Street, you’ll get views of Edinburgh Castle (the route includes an Edinburgh Castle stop and highlights views along the way). Then Victoria Street gets its own moment (about 15 minutes of guided sightseeing).
Victoria Street is said to be an inspiration for Diagon Alley, and the tour makes sure you pause where it counts. This is where your brain tends to start matching angles and storefront-style street energy with scenes you already know.
Victoria Street is also a great spot to check the group’s mood. If you’re the type who loves walking tours but feels like they can be too factual, this is where the facts turn playful. If you’re the type who wants every detail explained, you’ll likely appreciate the guide linking what you see to why it might have sparked Rowling’s world.
Edinburgh City Chambers: Rowling’s impact on the city

Near the end of the guided walk, you finish close to Edinburgh City Chambers (about 10 minutes of guided sightseeing and walking). The tour’s framing here is straightforward: it connects Rowling’s impact to the city itself.
This isn’t about one specific plot point. It’s about understanding that the series has become part of Edinburgh’s modern identity. You’re seeing that influence in how people talk about places and why fans come looking in the first place.
If you like being able to explain a place to others, this stop helps you connect the fandom story to real civic presence.
The Lost Close underground experience and gin tasting
After the walking tour, you get some free time before heading to the underground cellar for The Lost Close experience. The tour indicates your gin expert will take you deep underground to forgotten streets of Edinburgh, and your guide will not join you inside The Lost Close.
This separation is worth knowing. It means the atmosphere and instruction switch from the Harry Potter walking guide to the gin expert. The vibe changes from stories-on-stone streets to a more nightlife-style tasting experience.
The tasting itself includes multiple gins from different regions, including highlands to lowlands. That variety is a good choice for first-timers because it shows that “Scotland gin” isn’t one single style. You’re not just drinking one kind over and over. You’re comparing differences, which makes the whole thing more memorable than a quick pour-and-go.
The Lost Close portion is listed as a visit and walk lasting up to about 80 minutes. That’s enough time to try multiple gins, listen to the expert, and settle into the underground setting without it feeling rushed.
Price and value: is $87 worth it?
At $87 per person for about 3.5 hours, you’re paying for a two-part experience: a guided Harry Potter walking tour plus an expert-led gin tasting in an underground setting. What makes the price feel reasonable is that it’s not just “a walk with a few trivia stops.” The route is structured and time-boxed, and the second half adds real-guided tasting.
Also, the group size is limited to 10. That helps value because you’re less likely to get lost in a crowd during the story stops.
Two more value points that matter for decision-making:
- You get both Harry Potter connections and Scotland’s gin culture in one ticket, so you don’t have to plan two separate evening activities.
- You’re provided a gin expert for the tasting, which is part of why a tasting is more than a casual sample.
Main drawback on the value side: food and drinks during the walking tour aren’t included. You’ll want to plan around that, either by eating beforehand or keeping a little flexibility for later.
Practical notes that will help you enjoy it
This tour is a good fit if you want a social walking experience, not a solo wander with a handheld app. The key group rules and logistics are simple but important.
- Age rules: participants must be 18 or older. If you’re under 25, bring photo ID.
- Not for kids, and not for pregnant women.
- You need an ID or passport, and copies are accepted.
- No luggage or large bags. Travel light.
- The walking portion is your main exercise, so comfortable shoes are not optional.
Also keep your expectations aligned with the format. The walking guide leads your Potter stops, but you won’t go inside The Lost Close with that same guide. You’ll switch to the gin expert underground, which is exactly what you want for a tasting experience, but it’s good to know so you’re not surprised by the change.
Who should book this Potter-and-gin combo
I’d recommend it if you fall into one of these categories:
- You love Harry Potter and specifically enjoy the origins angle, where a guide connects real Edinburgh spots to Rowling’s ideas.
- You want a small-group tour that’s more personal than the big bus style.
- You’re looking for a fun Edinburgh evening that mixes sightseeing with something you can taste and talk about.
It’s probably not your best choice if:
- You don’t drink gin or you hate alcohol-focused evenings.
- You want a low-walking, minimal-stops experience.
- You need a tour designed around mobility accommodations, since this includes walking on historic streets and an underground visit.
Should you book this Edinburgh Harry Potter origins and gin tasting?
If you’re spending a few days in Edinburgh and you want one activity that feels both fan-focused and locally grown, I think this is a strong pick. The Harry Potter walking portion gives you recognizable landmarks tied to the series, including the Elephant Café and Greyfriars Kirkyard, and the gin tasting finishes the night with atmosphere and expert guidance.
Book it if you can meet the 18+ requirement, travel light, and you’re happy with a 3.5-hour plan. Skip it if you want a slower, food-centered outing or if underground and alcohol-focused tastings aren’t your thing.
FAQ
Where do I meet for the Harry Potter and gin tasting tour?
You meet outside Tron Kirk Market on the Royal Mile, opposite Bella Italia. Waverley Station is the nearest train station, about a 10-minute walk away.
How long is the experience?
The total duration is listed as 3.5 hours.
What size is the group?
The group is limited to 10 participants.
Is there an age requirement?
Yes. Participants must be 18 or older. If you’re under 25, you need photo ID.
Does the walking tour include food or drinks?
No. Food and drinks during the walking tour are not included.
Will the walking guide go with you inside The Lost Close?
No. Your guide will not be joining you inside The Lost Close. You’ll be with the gin expert for the underground experience.
What ID do I need to bring?
You can bring a passport or ID card, and a copy is accepted.
Can I cancel and get a full refund?
Yes. Free cancellation is available up to 24 hours in advance for a full refund.
]]>I also like that the guide—Rishi is the name you’ll see again and again—keeps the pacing lively and the details clear. You’ll hear about medieval life, the city walls, and the Celtic threads behind Edinburgh’s older identity, including Auld Reekie and the name Old Smokey.
The possible downside is simple: if you hate walking on uneven, tight old-street layouts, the route’s ups and downs (and the changing street levels) may feel like more effort than the 1.5-mile distance suggests. If rain hits, bring weather-appropriate clothing so the day stays fun.
Key things that make this tour worth it
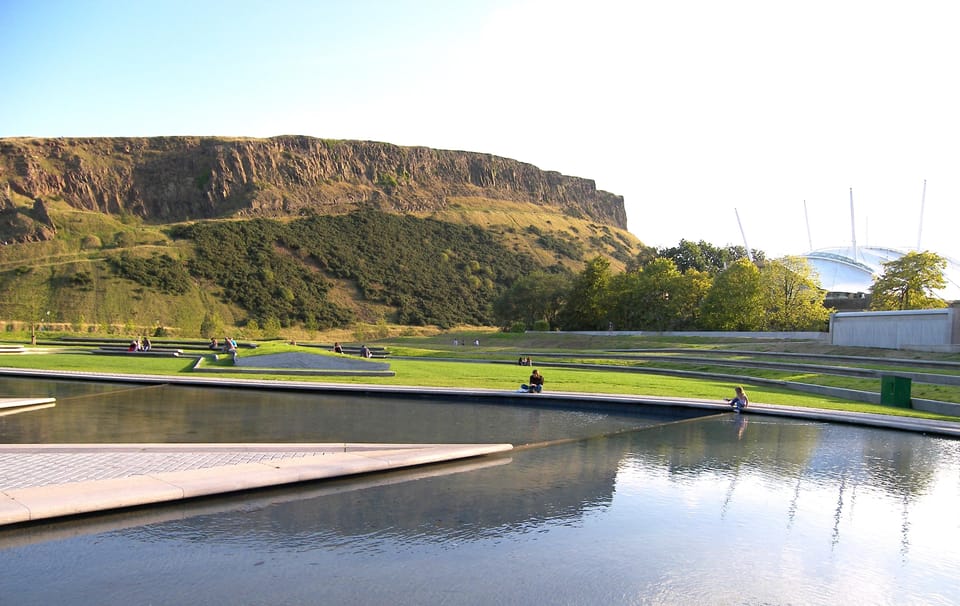
- Royal Mile focus: You get the spine of Old Town, not random stops.
- Medieval street levels: Pass under and over different layers of streets and alleys.
- Auld Reekie and Old Smokey: Celtic history and city lore woven into the route.
- Harry Potter locations: Real-world spots tied to the stories you already know.
- Guide energy (Rishi): Enthusiastic storytelling that makes facts easier to remember.
Royal Mile start at Camera Obscura, by Edinburgh Castle
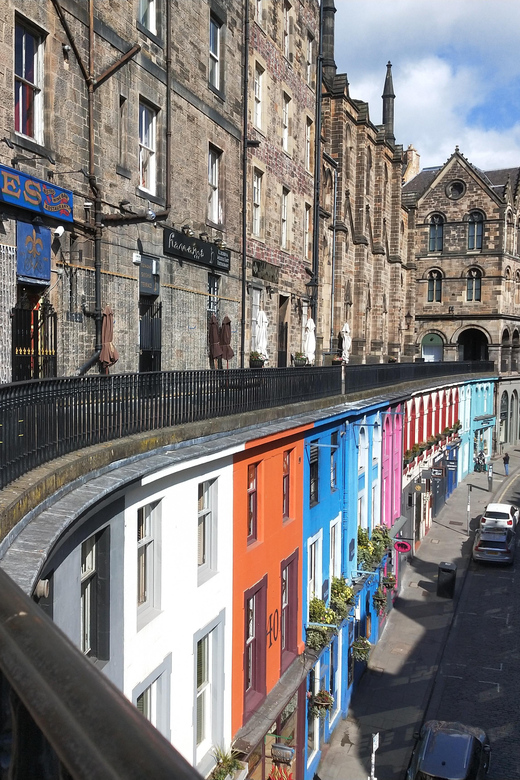
You meet near Camera Obscura & World of Illusions, close to Edinburgh Castle. That location matters because it puts you right at the top of the Old Town story, where the streets feel old the second you step out.
From there, the tour heads along the Royal Mile, the historic main route that shaped how the city grew. This is the kind of walking plan that works well when you’re short on time, because you’re covering the iconic corridor rather than scattering around a map.
If you’re the type who likes your sightseeing with context, you’ll appreciate the setup. You’re not just looking at buildings—you’re being guided through why this area matters, how it developed, and what daily life might have felt like hundreds of years ago.
How the route shows medieval Edinburgh (without museum walls)
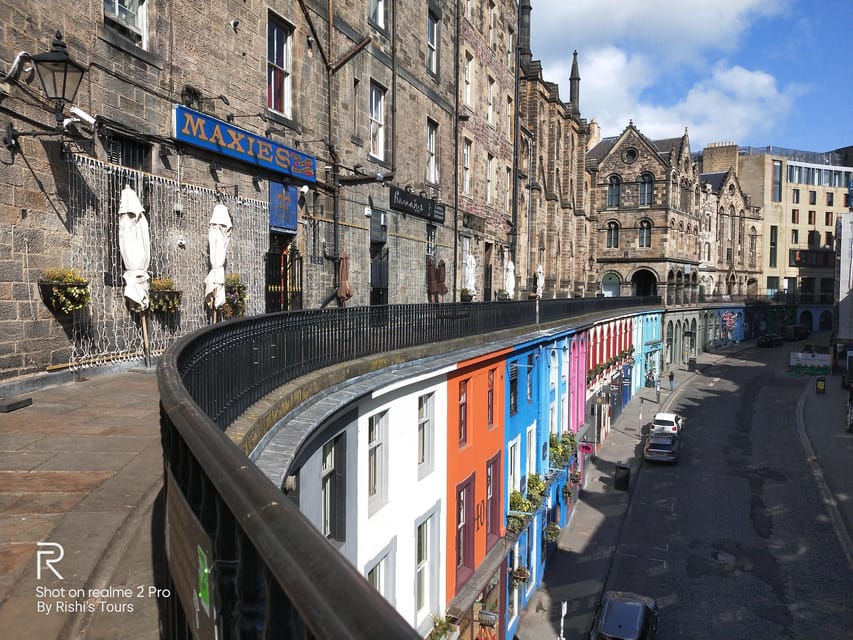
What I like most about the route is that it shows Old Town as a system, not a highlight reel. You’ll see how the medieval city functioned with narrow alleyways and connected passages, including spots where you move between street levels.
That detail can be easy to miss on your own. Edinburgh’s Old Town is layered, built up over time, and the tour uses that reality to help you read the city as you walk. So when you pass under and over different levels, you’re not just changing direction—you’re seeing how the layout evolved.
The tour also highlights the city walls and how they enclosed the old city. Even if you’ve only seen a wall section in photos, walking near where it shaped movement gives you a better sense of boundaries, safety, and how people navigated the space.
And yes, you’ll get medieval architecture along the way. The point isn’t to list façades; it’s to connect design choices to real needs—housing density, street traffic, and the practicalities of living in tight quarters.
Auld Reekie and Old Smokey: Celtic roots and city lore

This is where the tour feels extra “Edinburgh.” You’ll hear stories around Auld Reekie, the old nickname tied to the city’s past, and you’ll also hear about the ancient name Old Smokey. That may sound like lore, but it works because it frames what you’re seeing.
The guide also brings in ancient Celtic history and ties it to the older identity of the city. You’re not just absorbing dates; you’re learning how layers of culture influence language, identity, and the way people talk about a place over generations.
One of the best parts is the focus on how people lived. The tour points out details that help you imagine everyday life—where people moved, how spaces were used, and what the street environment likely meant for daily routines.
If you like history but don’t want an academic lecture, this style tends to land well. It’s story-first, and the facts are there to support the story rather than interrupt it.
Harry Potter sightings on a real Old Town walk
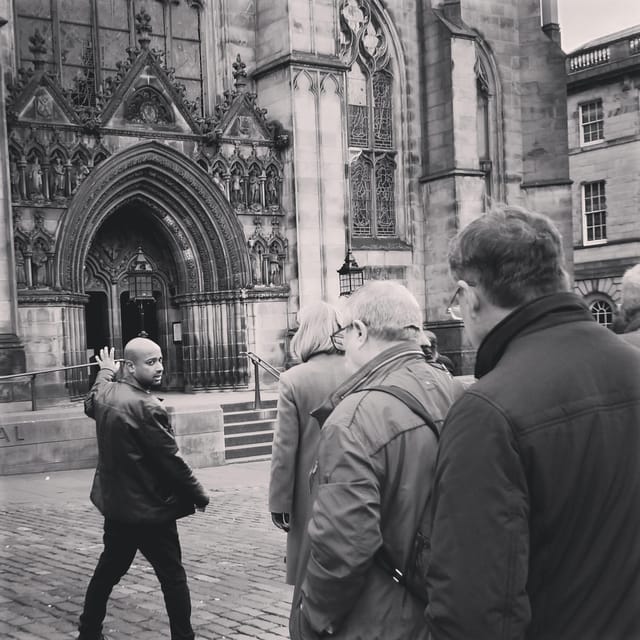
I love that the Harry Potter element is woven into the walk instead of hijacking it. You’ll come across well-known Harry Potter-related sites while you’re already doing the main thing: following the Royal Mile and seeing medieval Edinburgh in context.
This matters because Edinburgh is the kind of city where the fictional and the real overlap naturally. When you spot a connection to the stories you love, you’re doing it while understanding the actual street scene—architecture, lanes, and the older city layout that made Edinburgh such a strong inspiration.
The tour also promises “secrets,” and the way it’s described here suggests they’re the fun kind: small, memorable details that help the places click in your mind. It’s the difference between seeing a themed photo stop and understanding why a location fits the story.
If you’re traveling with Harry Potter fans, this is one of those tours that keeps both sides happy. You get history and city texture, and they get the recognition factor that makes the walk feel like more than a generic sightseeing loop.
The itinerary in plain English: what happens at each end
The experience is built around a simple flow: start near the Castle end of Old Town, then move through the Royal Mile toward the High Street side.
Stop 1: Camera Obscura & World of Illusions (your starting point)
You begin at Camera Obscura & World of Illusions, a landmark you can’t miss, and conveniently close to Edinburgh Castle. This is a smart meeting point because it makes orientation easy, and it gives you a major reference point right away.
From the start, the guide sets up what you’re about to see: the Royal Mile as a full corridor, the idea of street levels and alleys, and the city’s medieval enclosure. You’re essentially getting the “how to read the Old Town” briefing before you walk.
Stop 2 (finish): Scottish Parliament Building near the High Street end
Your walk finishes outside the Scottish Parliament Building, described as being at the opposite end of High Street. That’s a great way to end because it changes the feeling of the area at the end of the tour—more open, more modern landmarks, and a clean point to re-orient before you head off on your own.
One note to keep you from getting surprised: the meeting-point info says the activity ends back at the meeting point, while the itinerary places the finish near the Scottish Parliament Building. In practice, plan for a finish on the Parliament/High Street side, not a literal return to the exact first sidewalk corner.
Price and value: is $59 fair for a 2-hour Old Town walk?
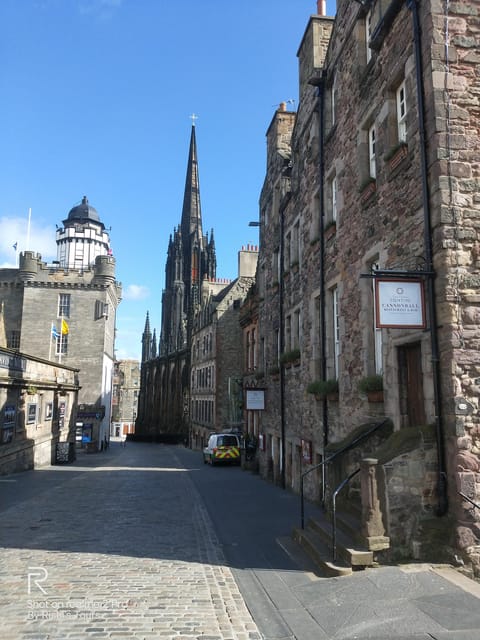
$59 per person for a 2-hour guided walk is a reasonable ask in Edinburgh, especially for a route that covers the Royal Mile with real context. You’re paying for a live guide, and the guide’s job here isn’t just pointing out sights—it’s connecting the streets to medieval life, Celtic history, Auld Reekie lore, and Harry Potter-related locations.
The value improves if you’re visiting Edinburgh for a short stay. In a couple of hours, you get orientation, storytelling, and a clear sense of how Old Town works. That means fewer hours later spent trying to figure out what matters and where to go.
It’s also good value if you like guided narrative. A self-guided walk can be great, but this tour is built for people who want the city explained while they’re moving through it.
If you already know Old Town very well and don’t care about Harry Potter connections or Auld Reekie lore, you might feel the cost more. But for first-timers—or anyone who wants a smarter, guided pass through the iconic core—it holds up.
Walking distance, timing, and who this tour fits best
The tour runs about 2 hours, and the walking distance is around 1.5 miles. That’s not long on paper, but the route includes changing street levels and narrow alleyways, which can feel more physical than the mileage suggests.
This fits best if you:
- want a structured overview of Edinburgh’s oldest core
- like history that’s told as a story, not just dates
- want Harry Potter sites without spending a full day on themed stops
It’s less ideal if you have very limited mobility or strong difficulty with uneven old-city paths. That said, it’s listed as wheelchair accessible, so it’s worth checking directly if you need specific route accommodations.
One more age note: it’s not suitable for children under 5. If you’re traveling with younger kids, plan something else or choose a family-friendly pace elsewhere.
What to bring so the tour stays comfortable
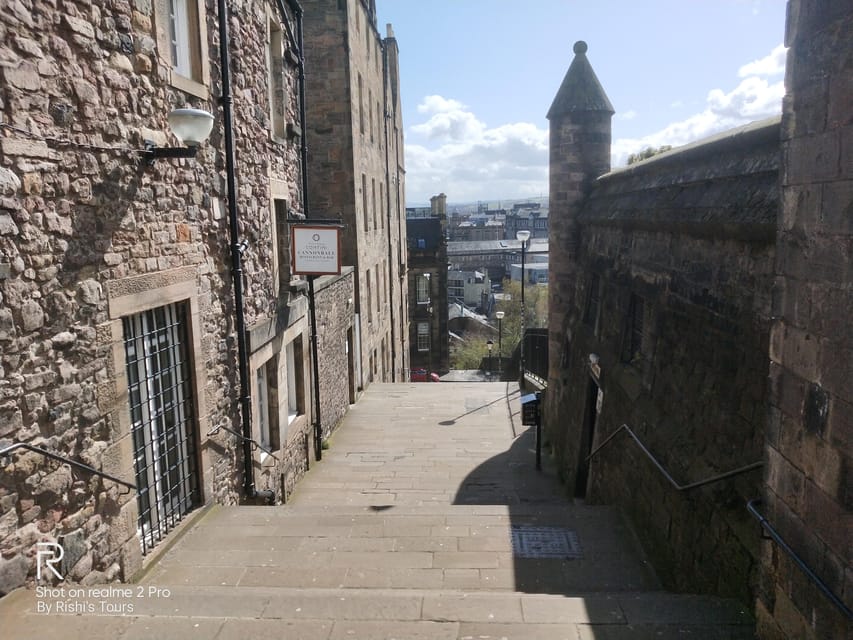
Bring comfortable shoes because you’ll be walking Old Town streets with tight lanes and street-level changes. Also pack weather-appropriate clothing; Edinburgh weather can shift quickly, and you’ll be outside the whole time.
If rain is likely, a light waterproof layer makes the difference between enjoying the stories and being miserable while listening. The tour’s content is memorable, and you’ll get more out of it when you’re physically comfortable.
The big takeaways you’ll remember days later
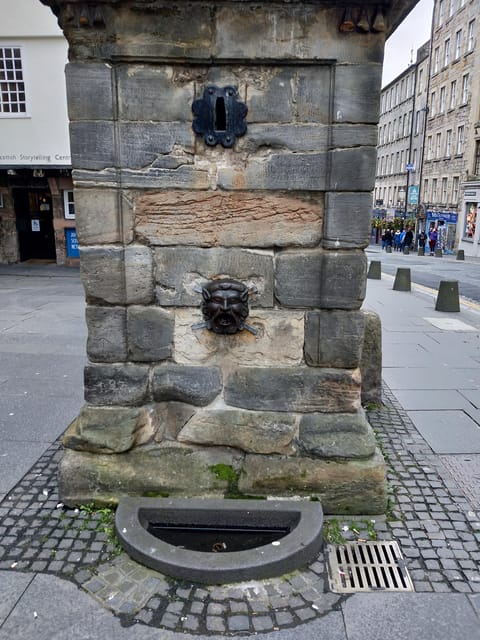
After a tour like this, the Royal Mile stops being just a line on a map. You start to see it as an older “communication corridor” shaped by walls, dense living, and the city’s layered design.
You’ll also walk away with names and concepts that make Edinburgh feel more personal. Auld Reekie and Old Smokey aren’t just odd labels—they become part of how you interpret the city’s past.
And if you’re a Harry Potter fan, you’ll likely remember the exact feeling of finding connections in the real streets. That mix—fiction cues plus historical context—is where this tour earns its keep.
Should you book this Edinburgh Old Town Highlights Walking Tour?
I’d book it if you want an easy win: a guided pass through Old Town Edinburgh with medieval architecture, Auld Reekie lore, and Harry Potter-related stops, all in about 2 hours. It’s a good fit for first-timers, history-lovers who prefer story over lectures, and fans of the books who want real-world connections.
Skip it if you want a long, slow wandering day with lots of free time to sit and explore on your own, or if your walking tolerance is very limited. With the street-level changes and narrow Old Town lanes, comfort matters.
If your goal is to get oriented fast and leave with real stories tied to real streets, this one makes the call easy.
]]>You’re not going to get bored here: the canyon gives you a string of natural obstacles that keep the adrenaline up without feeling chaotic. One thing to consider before you book is the fitness/eligibility limits—this one isn’t suitable for kids under 16, pregnant women, or people over 120 kg, and on rare days weather or water levels can change the plan.
Key highlights you’ll care about
- Double-waterfall abseil with guidance, not guesswork
- Challenge by choice sections so you can set your own pace
- Full wetsuit-and-helmet style canyon kit, including neoprene accessories
- Changing robes plus hot drinks after the trip, so you’re not left freezing
- A photo link sent within 24 hours
- Small-group feel is possible, which makes instruction feel more personal
Laggan Canyon near Roybridge: what makes this canyoning run different
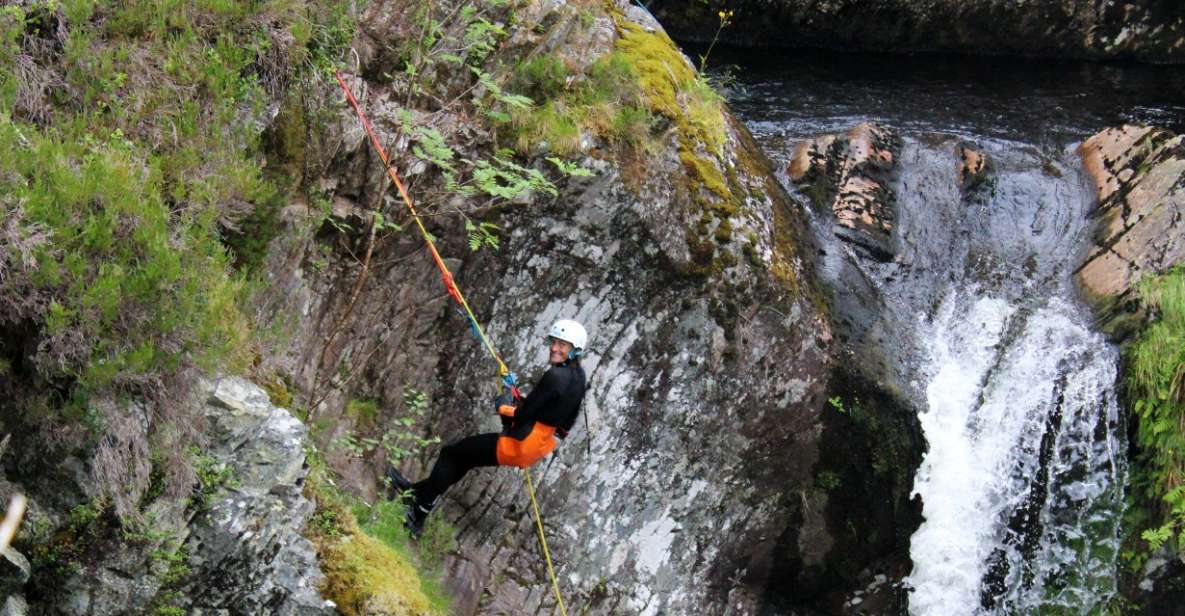
Laggan Canyon is the kind of place that makes you realize how much you normally miss in the Scottish Highlands. Instead of just looking at cliffs and waterfalls from a road or a viewpoint, you move through the canyon itself—on foot, then in and around the water—using the canyon’s own features as your route.
The day is built around variety. You’ll scramble across rocky ground, slide down natural water features, and take the kind of jumps that feel big until you’re actually at the edge and your guide has already talked you through it. And then there’s the highlight that canyoning fans circle on their mental map: an abseil through a double waterfall. That’s not just a thrill moment. It also changes your perspective—suddenly you’re working your way down while water pours beside and above you, with your instructor helping you stay in control.
What you get from a trip like this is twofold. First, it’s active fun you can’t replicate in a normal hike. Second, it’s a front-row seat to the canyon’s details—how water carves rock, how narrow the gorge gets, and how quickly the sound and feel of the river changes as you go.
Meeting at the Roy Bridge layby and getting geared up fast
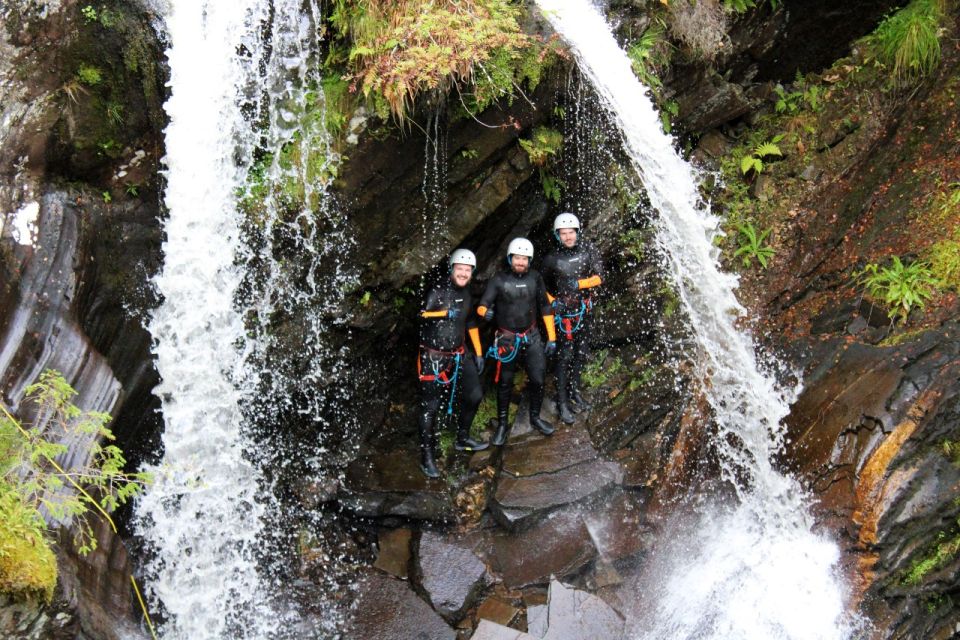
The day starts at a small layby where you’ll spot the River Wild Adventures vehicle and trailer. It’s a simple setup, which matters. You don’t want a long, complicated pre-trip routine when your main goal is getting suited up and heading into the canyon.
From the moment you arrive, the experience is designed to reduce friction:
- A friendly guide welcomes you.
- You get geared up with the canyon essentials.
- You get a safety brief before anything sketchy happens.
The practical win here is how much of the comfort is handled for you. River Wild Adventures provides wetsuit, helmet, harness, buoyancy aid, and neoprene boots, plus neoprene accessories like a skull cap, gloves, and socks. If glasses are part of your world, there’s also a strap option where required. You don’t need to show up with a shopping list of gear, and that alone can make canyoning feel much more approachable.
There’s also a private changing setup. You get changing robes, and the team can provide toilet facilities. That means you’re not trying to change in public or deal with awkward logistics on a remote Highland day. After all, canyoning is wet work. Comfort at the start and end makes the whole experience better.
The safety brief and the “challenge by choice” approach
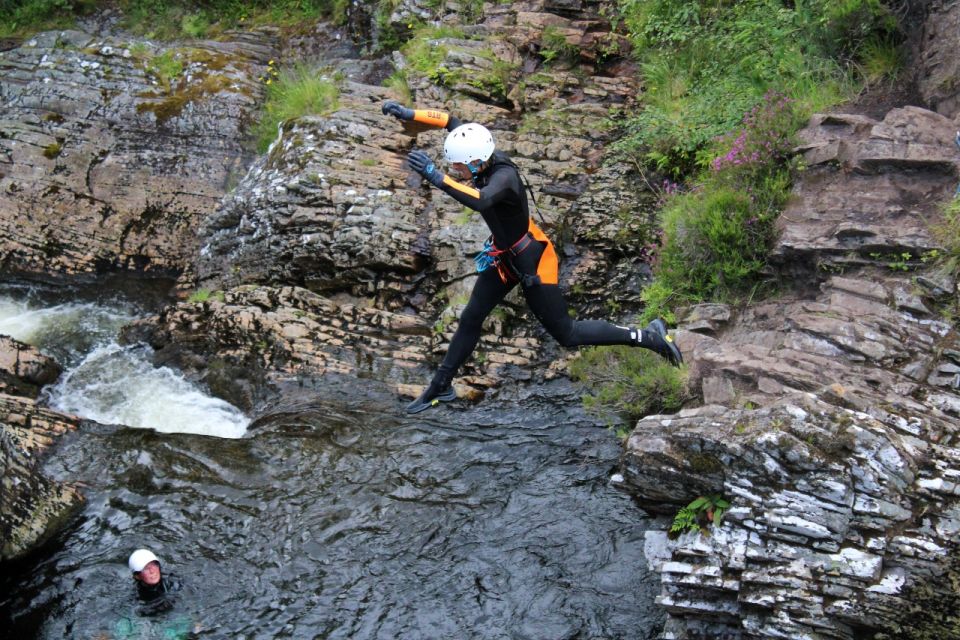
Before you go, each participant completes an Acceptance of Risk form. You’ll also get a safety brief that covers how things work on the day—how to move, when to wait, what to do at the start of tricky sections, and how your guide will support you.
Then comes the big mindset: each feature is challenge by choice. That’s important for two reasons.
1) It lets you push without feeling forced. If you’re comfortable with heights, you might lean in on the abseil-style sections. If you want to keep it more controlled, you can still enjoy the route and the adrenaline without taking on extra risk.
2) It makes beginners feel included. This canyoning experience is suitable for both beginners and people with previous canyoning experience, since the guides tailor the adventure to the group’s skill level.
Your guide is there to support you at the challenging parts—so you’re not left to figure out how to slide, jump, or move through the canyon on your own. That’s the difference between “adventure” and “accident waiting to happen.”
Down the canyon: scrambling, slides, jumps, and the double-waterfall abseil
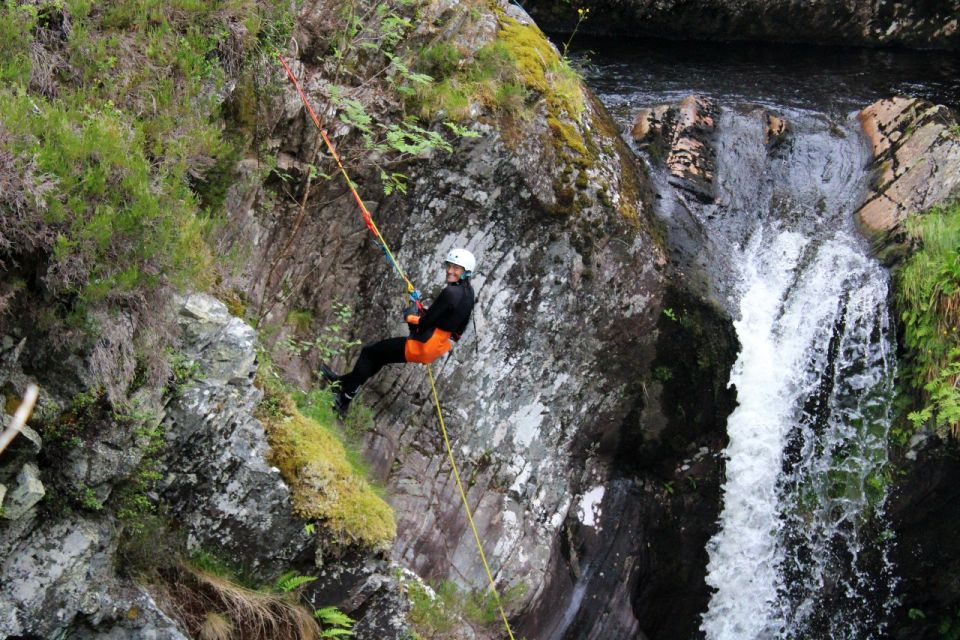
Once you’re geared up and the safety talk is done, you start moving into Laggan Canyon. Expect a mix of on-foot sections and water features.
Here’s the flow you’ll likely feel throughout the trip:
- You approach the canyon on rocky terrain, using scrambling as your warm-up and getting used to your grip and footing.
- You hit crystal-clear pools and water obstacles that guide your route.
- Narrow gorges and waterfalls change how you move—some sections require careful timing, others are more about confident movement and trust in the setup.
- Then you get to the moment many people remember most: an epic abseil through a double waterfall.
The abseil is the kind of thing that can feel intimidating from the top. But in a well-run canyon, it’s not about bravado. It’s about technique and staying calm. Your guide’s job is to keep you steady—helping you understand what you’re doing, where to look, and how to manage the descent while water is doing its own loud, unstoppable thing around you.
Between the abseil and the water features, you’ll also get that classic canyoning combo: sliding on natural features, then being rewarded with a deeper pool to splash into. Those jumps can be the highlight for the thrill-seekers, but they also work as a confidence builder. The key is that you’re not pressured into going bigger than you feel safe doing.
And you’ll keep noticing the scenery while all that’s happening. Towering cliffs, lush greenery, and cascading waterfalls provide constant visual cues, not just background decoration. This is Scotland in motion.
Toilets, robes, hot drinks, and the free photo link
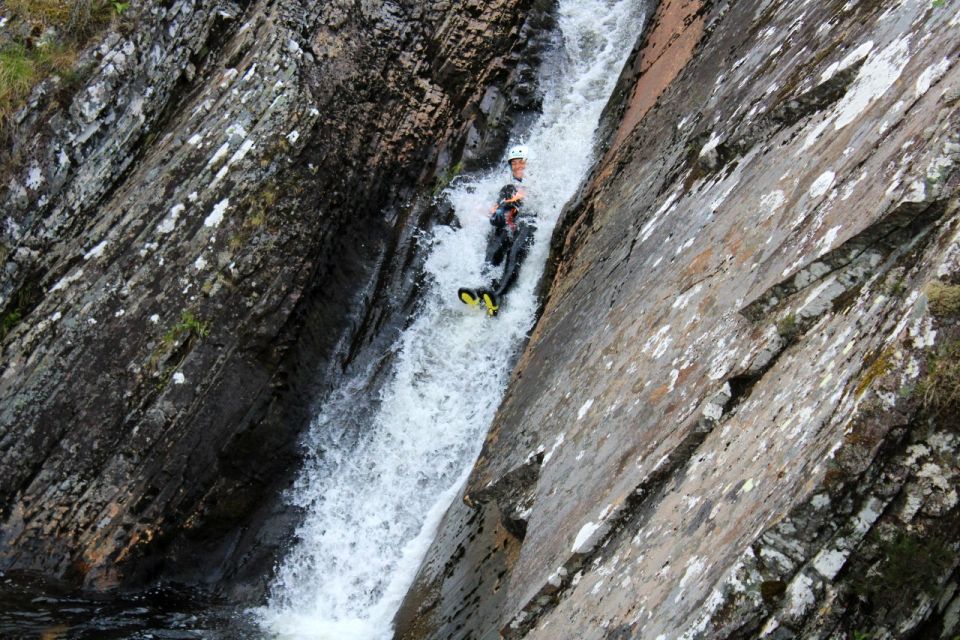
A good canyoning day ends like a good hike: with warmth, food or drink, and the chance to decompress.
When the trip finishes, you return to the same starting point—the meeting layby—so you can get changed back into dry clothes. The team provides changing robes and privacy while you swap out your wet gear. You also return wet items to River Wild Adventures, so you’re not stuck carrying dripping neoprene around for the rest of your trip.
Then you get hot drinks after the activity. It’s a small detail that matters more than it sounds. After three hours of cold water and wind, warm drinks help your body and your mood. You also get a chance to compare notes with other canyoneers and laugh about the moments that felt scarier on the way in.
Finally, there’s the photo component. You’ll receive a link to photos of your experience within 24 hours. That’s a big value add because canyoning days often come with a simple problem: you’re busy using both hands, staying safe, and staying balanced. Having professional photos ready later lets you remember the route without needing to bring a camera into the chaos.
What’s included in the $101 price (and why it’s not just the activity)
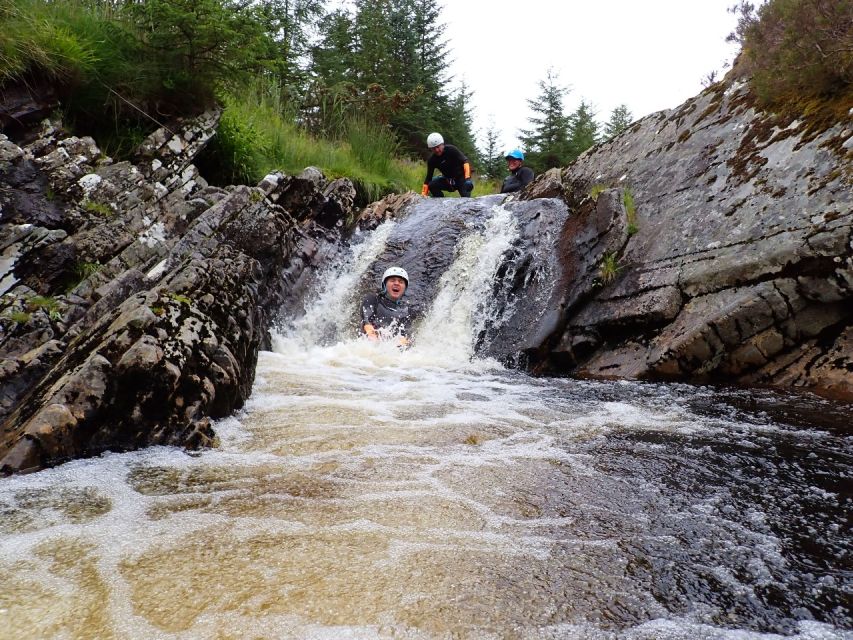
The price is listed at $101 per person for a 3-hour slot (with starting times that vary by availability). On the surface, you’re paying for canyoning. In practice, you’re also paying for the gear, the instruction, and the effort to make the day smooth.
Here’s what you should see as part of that value:
- Instruction and guided support through the tricky sections
- Complete canyoning kit: wetsuit, helmet, harness, buoyancy aid, neoprene boots
- Neoprene extras like gloves, socks, skull cap (so you’re not improvising with random items)
- Changing robes and access to toilet facilities
- Hot drinks after the trip
- A photo link delivered within 24 hours
If you’ve priced gear rentals for outdoor activities before, you’ll know how quickly costs add up. Here, the kit is part of the package, so you can show up ready instead of hunting for neoprene boots or a fitting helmet. You’re also buying time and expertise: the guide’s experience is what keeps the trip enjoyable rather than stressful.
Also, the trip is designed to be safe and tailored. The guides assess your group and adjust the route’s challenge to match your skill level, which helps beginners have fun and helps experienced folks feel they’re doing something real.
Who this trip suits best (and who should skip it)
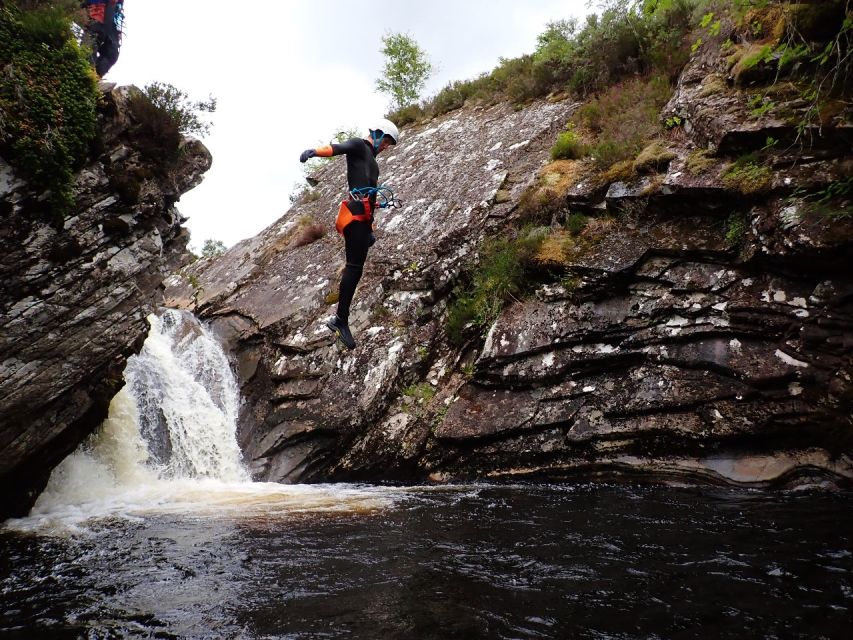
This canyoning experience in Laggan Canyon is a strong fit if you want:
- A guided adventure with a clear safety structure
- The thrill of water movement: slides, pools, and jumps
- A big feature moment: the double-waterfall abseil
- A comfortable end to the day with robes and hot drinks
It’s also good if you don’t want a solo mission. The route is guided start to finish, and the group’s ability influences how much challenge you take on.
But skip it if you fall into the listed limits:
- Children under 16
- Pregnant women
- People over 120 kg (264 lbs)
And if you’re taking part with any medical needs, bring your personal medication. That’s the only personal item specifically called out as necessary.
One more consideration: weather and water levels can sometimes make the plan unsafe. On rare occasions, the team alters the route and offers a suitable alternative. That’s not a reason to panic—it’s a sign they’re watching conditions rather than forcing the day to happen no matter what.
Practical tips so you feel comfortable on the day
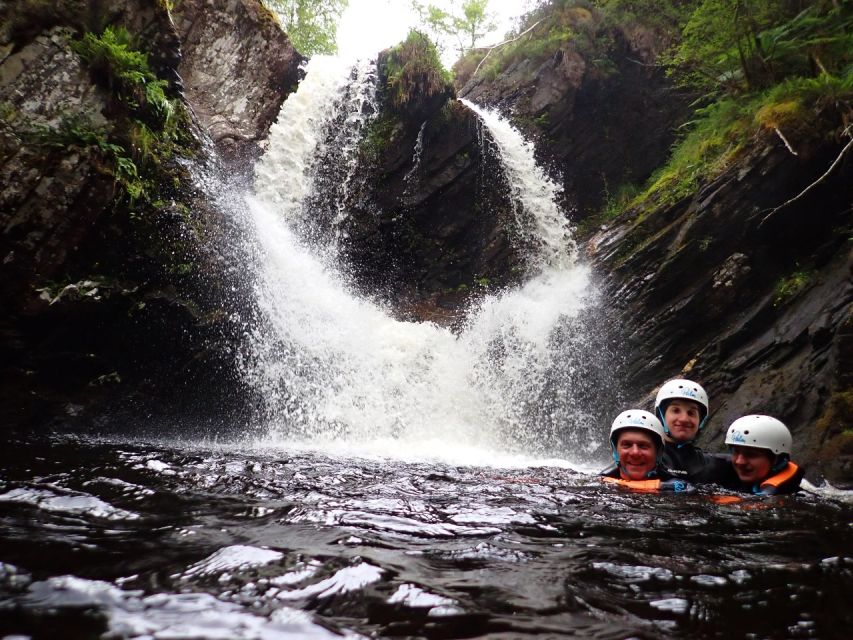
Based on what’s provided, your job is mostly about showing up prepared and respecting the safety rules.
Bring:
- Your personal medication
Wear:
- Whatever you can easily change out of (you’ll be getting wet and then changing at the end)
- Plan for cold water and wind after, even if the day starts mild
Don’t bring:
- Alcohol and drugs (not allowed)
Mentally prepare for:
- Wet work and slippery surfaces. Even when you’re doing the fun parts, the canyon demands attention.
- Heights and water at close range if you choose to go for the more intense features. The guide helps, but you still have to follow instructions and move at your pace.
Should you book Laggan Canyon canyoning with River Wild Adventures?
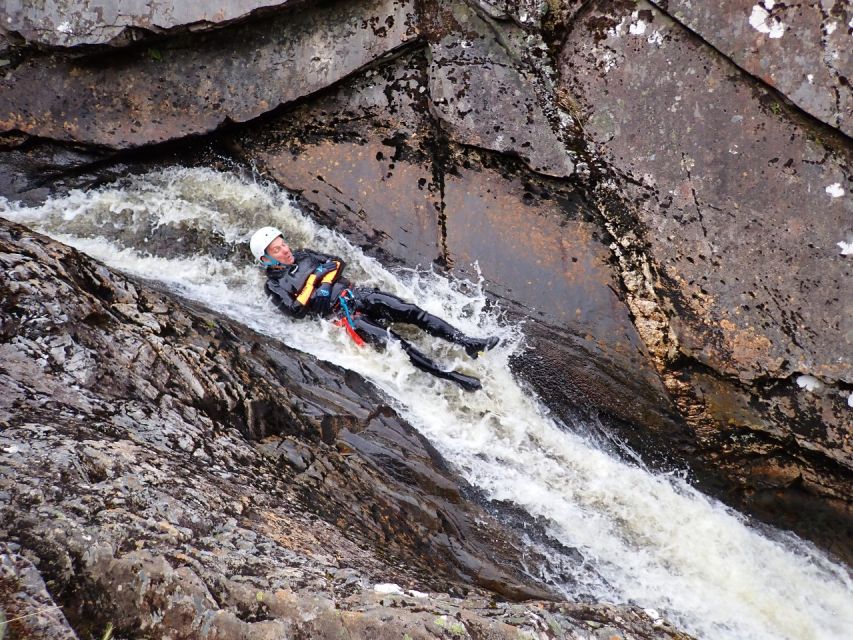
If you want a guided canyoning day in the Scottish Highlands that feels like real adventure—scenery you can only see this way, gear handled for you, and a memorable highlight—this is a smart booking.
I’d book if you like active days and you want a trip where safety doesn’t feel like a lecture. The combination of full equipment, a structured safety briefing, and challenge by choice makes it approachable for beginners without watering down the thrill for more experienced people.
I’d think twice if you’re within the stated limits (under 16, pregnant, or over 120 kg), or if you know you get overwhelmed by heights and you prefer calmer activities. And if you’re traveling during a season when rain can be heavy, keep flexibility in mind since water levels can change plans.
If your goal is to get out of the car, get suited up, and spend three hours doing something that feels both wild and well-run, Laggan Canyon is the kind of choice you’ll be glad you made.
FAQ
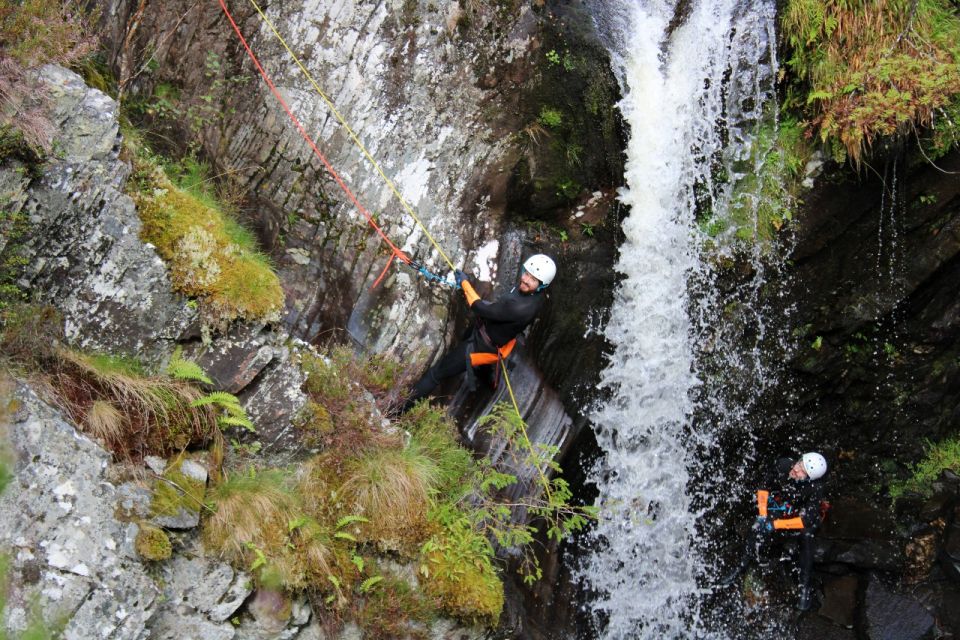
How long is the canyoning trip in Laggan Canyon?
The activity lasts about 3 hours. Starting times vary, so you’ll need to check availability for your preferred slot.
Where do we meet for the Laggan Canyon experience?
You meet at a small layby where you’ll see the River Wild Adventures branded vehicle and trailer parked. The start point is near Roy Bridge (Google Plus Code: W92F+63M).
Is this canyoning trip suitable for children?
No. It is not suitable for children under 16 years old.
Is it suitable for pregnant women?
No. The experience is not suitable for pregnant women.
What equipment is included?
You’ll be provided with wetsuit, helmet, canyon harness, buoyancy aid, neoprene boots, and neoprene accessories such as a skull cap, gloves, and socks. Glasses strap is provided where required.
What should I bring with me?
Bring your personal medication. Everything else for canyoning is provided.
What happens if weather or water levels make it unsafe?
On rare occasions, conditions can make the activity unsafe. In that case, the trip plan may be altered and you’ll be offered a suitable alternative.
]]>I like that the team leans in with real guidance. Dan and Alan help shape your flavor choices and keep your batch on track, even if gin is totally new to you. You’ll learn the process, sample a range of gins, distill, bottle, and then leave with a finished gin plus some branded swag.
Key points before you book
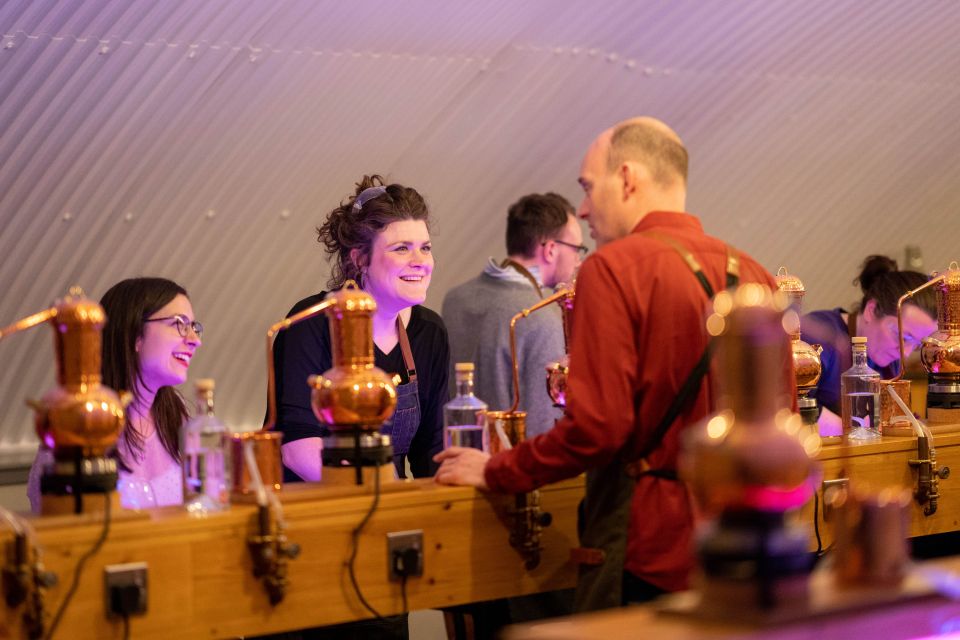
- Your own 70cl bottle to take home after you create the recipe
- Double G&T on arrival, plus drinks throughout the session
- 100+ botanicals to build your flavor profile, including fresh citrus and Macedonian juniper
- London Dry and fruit gin tastings so you understand styles, not just recipes
- Railway-arch location in Aberdeen where the scene feels distinctly local, even with trains overhead
Railway-Arch Arrival: Meeting at Arch #10
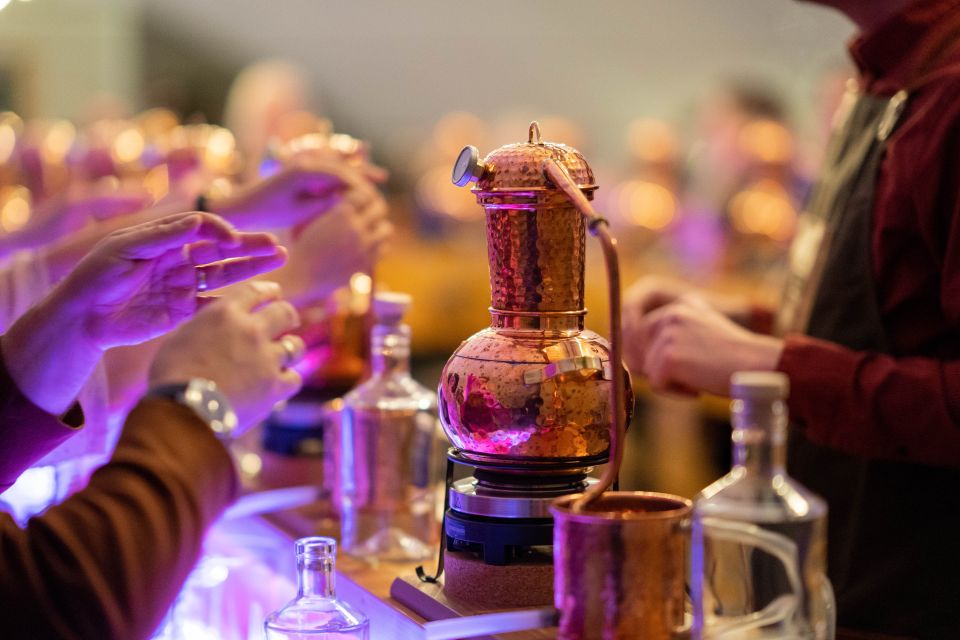
This experience starts in a very Aberdeen kind of setting: a railway arch. Head to the entrance labeled Arch #10, then go in through the arch doorway. It helps to arrive with enough time to settle in, because once you’re inside, the session moves quickly from greetings to tasting.
The whole class is 2 hours, which is an ideal length. Long enough to learn the basics, make meaningful choices, and actually watch (and take part in) the gin-making steps. Short enough that you’re not stuck for half a day when all you really want is a good story and a bottle to bring home.
A practical note: the distillery is described as single level, which is great for getting around. There’s also a dropped curb close to the property, plus a wheelchair WC available. The gin-making bench is designed for extra mobility needs too, though places are limited, so it’s smart to plan ahead if you need a specific setup.
Welcome Double G&T and the Fast Track to Your Tastes

You’ll begin with a double G&T on arrival. That’s not just a nice start—it sets your palate right away. After that, you’ll get samples from the gin range and some mixers, and the structure helps you figure out what you actually like (rather than guessing).
In past sessions, Dan and Alan are known for jumping in early and staying hands-on. One of the best parts of this setup is that you’re not left alone with a tasting glass while everyone else does the boring work. You get help choosing a direction, then you get repeated chances to taste and adjust.
You’ll also find the drinks aren’t restricted to gin alone. Along the way there are additional alcoholic options, including Prosecco and a berry cocktail, plus non-alcoholic alternatives like water and soft drinks. That matters if you want to stay social without going overboard.
One more thing: the class is designed around aroma and flavor. The guidance is to avoid strong fragrances, because perfumed clothes or hair can overpower what you’re trying to smell in the botanicals. It’s a small rule, but it makes your tastings more accurate—and more fun.
Picking Botanicals Like a Distiller (Juniper, Citrus, and Spices)

This is where the experience earns its keep. You use premium organic alcohol and choose from over 100 botanicals. That’s not “pick one of three flavors.” It’s real choice. You’re building a recipe that fits your taste, not copying a standard label.
A key ingredient in the classic style is Macedonian juniper, described as a cornerstone of a traditional gin recipe. Juniper is the backbone in most gin, but the way you balance it with citrus, herbs, and spice is what makes your gin feel like yours.
You’ll also have access to fresh citrus, plus botanical options described broadly from places far beyond Scotland—think oranges and even Asian-style spice notes, based on what’s available in the program. Since you’re tasting the range as you go, you’re not just throwing botanicals into a recipe and hoping. You’re learning how changes taste, then applying that knowledge to your own mix.
If you’re a total beginner, don’t worry. The process is set up to guide you through decisions. If you already like gin, you’ll appreciate how the class turns preferences into actual recipe steps.
The Distilling Step: Turning Botanicals Into Your Batch
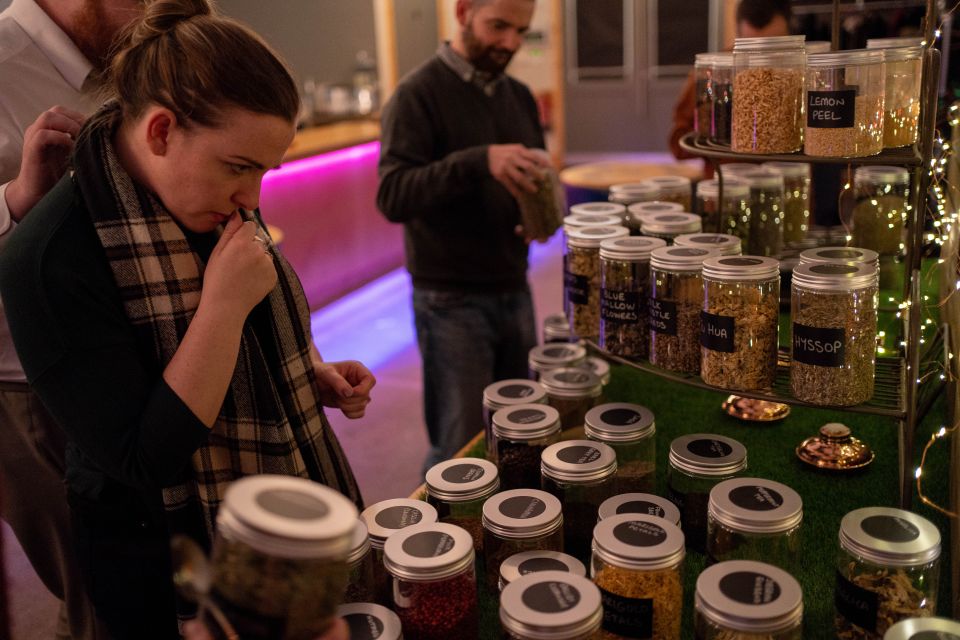
At some point, you get to the part most people came for: watching the transformation from botanical ingredients to finished gin. The experience frames it as you becoming the mastermind behind the bottle, and the guidance from the head distiller is central here.
What makes this step valuable is that you learn it as a process, not a magic trick. You’ll be guided through the steps of distilling using premium organic alcohol, with your botanicals tied to the profile you chose earlier. You’re still learning the fundamentals, but you’re also producing something real enough to bottle and take home.
Even if you’re not a “science person,” you’ll understand the logic: gin flavor comes from the botanicals, and distilling is the method that carries those flavors into the spirit. Your job is to set the flavor direction early, then let the process do what it does.
Also, don’t expect the room to be a silent lab. One highlight is that trains rumble overhead. That background sound is part of the charm here. The session feels tied to the city, not locked in a themed, pretend set.
Sampling Like a Pro: London Dry and Fruit Gin Styles
A smart part of this gin school is that you don’t just make your bottle and call it a day. You sample a range of gins so you learn what different styles taste like in practice.
You’ll try both London Dry and fruit gin styles, and that helps you understand the difference between gin that leans on traditional structure and gin that brings forward fruit notes. This matters because people often say they like gin, but what they actually like might be juniper-forward, citrus-forward, or something more rounded and sweet.
The tastings are also paired with practical guidance. In one review, the sampling method is described as tasting neat first, then trying mixers for each. That’s useful because mixers can change everything: a botanical that feels sharp neat can feel balanced with the right mixer, and the opposite can happen too. You’re not just tasting to be polite—you’re training your palate.
And yes, there’s more to drink across the session, including Prosecco and a berry cocktail. It keeps the mood lively, especially for couples or birthdays, while you’re learning.
Bottling, Naming, and the Satisfaction of a Done Bottle

The payoff arrives when you bottle your gin. This is more than a souvenir step. It gives the session closure and makes your choices feel concrete. You’re not leaving with a vague idea of how gin works—you’re taking home a 70cl bottle that reflects your recipe.
Before the end, there’s the fun final challenge: you get to name your gin. It’s silly in the best way, but it also forces you to think about what your bottle tastes like. If your recipe is citrus-bright, your name will probably reflect that. If it leans spiced, you’ll likely pick something that sounds warmer or bolder.
Then there’s a surprise cocktail at the end to toast your new title as an Aberdeen distiller. The exact flavor isn’t listed, but the format is clear: you finish with a final drink built to celebrate what you made.
After that, you also pick up swag—drink mats, a branded pen, and a postcard. It’s small, but it makes the experience feel like a real event, not just a class you pass through.
Price and Value: What $190 Buys You in 2 Hours

At around $190 per person for a 2-hour session, you’re not paying for a talk. You’re paying for hands-on instruction, tastings, multiple drinks, and the most expensive part for most gin lovers: a bottle you take home.
This value equation changes depending on what you’d otherwise do. If you were planning to buy a nice gin bottle and spend the afternoon wandering, this is a different kind of spend. Here, you get guided tastings and the experience of building your own recipe—with enough structure that you come away feeling confident, not confused.
Also, the session includes alcohol throughout and a welcome double G&T, plus non-alcoholic alternatives. That means part of what you pay goes toward keeping the experience social and steady while you learn.
If you’re strict about budget, it’s still a splurge. But if you want something genuinely hands-on in Aberdeen, and you care about craft spirits, the bottle and the guided steps are what make it feel fair.
Who Should Book This Gin School, and Who Might Not
This experience fits best if you want a guided, playful craft session with a real endpoint. It’s great for:
- Couples looking for a memorable date idea that doesn’t feel like a standard dinner
- Gin newcomers who want clear steps and help shaping a recipe
- Gin fans who like tasting styles and comparing what botanicals actually do
It might be less ideal if:
- You’re very sensitive to strong scents or don’t want to spend time in an aroma-focused room (the advice to avoid strong fragrances is real for a reason)
- You want a quiet, museum-style experience instead of a lively, drink-included class
- You need very specific accessibility accommodations. The space is described as single level and bench seating is designed for mobility needs, but places are limited, so you should contact the team to confirm what’s possible for your setup.
Also, pets aren’t allowed except guide dogs. If you’re traveling with a companion animal, plan for that in advance.
Quick Practical Tips for the Best Experience
These are the details that help you get the most out of the session:
- Bring your passport or ID card.
- Avoid strong fragrances so you can actually smell botanicals properly.
- Wear something comfortable. There are some standing sections, even though seats are available throughout.
- If you’re booking with mobility needs, note that the bench is designed for wheelchairs and scooters but availability is limited, so check what fits your situation.
- The meeting point is very specific: Arch #10 in the railway arches.
And if you want a small extra perk, free Wi-Fi and branded swag are included—handy if you want to share photos while everything is still fresh in your mind.
Should You Book the City of Aberdeen Gin School?
If you want a true hands-on experience and you care about taking something home that matches your taste, I’d book this. The combination of your own 70cl bottle, guided distilling steps, and the structured tastings (including London Dry and fruit styles) is what makes it more than a drink-and-learn afternoon.
Choose it especially if you’re the type who likes making choices, tasting your way through preferences, and leaving with a bottle that isn’t just off-the-shelf. If you’re trying to keep things super quiet, fragrance-free, or pet-friendly, you may want to think twice. But for most people—especially couples, birthdays, and first-timers—it’s a fun, practical way to understand gin and leave Aberdeen with something you personally made.
FAQ
How long is the gin school experience?
It lasts 2 hours.
Where do I meet for the experience?
You should enter the railway arch at Arch #10 (as indicated above the doorway).
What do I take home at the end?
You make and bottle your own Scottish gin in a 70cl bottle that you take home.
Is there a welcome drink?
Yes. You get a double G&T on arrival.
What kinds of drinks are included during the session?
You’ll have alcoholic drinks throughout, and the program also notes samples of Aberdeen Gin, plus Prosecco and a berry cocktail. Non-alcoholic alternatives like water and soft drinks are available too.
Do I get to choose botanicals for my gin?
Yes. You use premium organic alcohol and select from over 100 botanicals, including handpicked options like Macedonian juniper and fresh citrus.
Can beginners join if I don’t know much about gin?
Yes. The experience is structured so you learn how to make gin and how your choices affect flavor.
Is the experience wheelchair accessible?
It is described as wheelchair accessible. The distillery is all on one level with a dropped curb near the property, and a wheelchair WC is available. The gin-making bench is designed for additional mobility needs, but places are limited.
Are pets allowed?
Pets are not permitted in the distillery, except for guide dogs.
What should I bring with me?
Bring your passport or ID card.
]]>